Billing Subscription Management
The Billing and Subscription pages in Qodly offer comprehensive tools for managing payments, invoices, and environment-specific subscriptions.
Billing Page
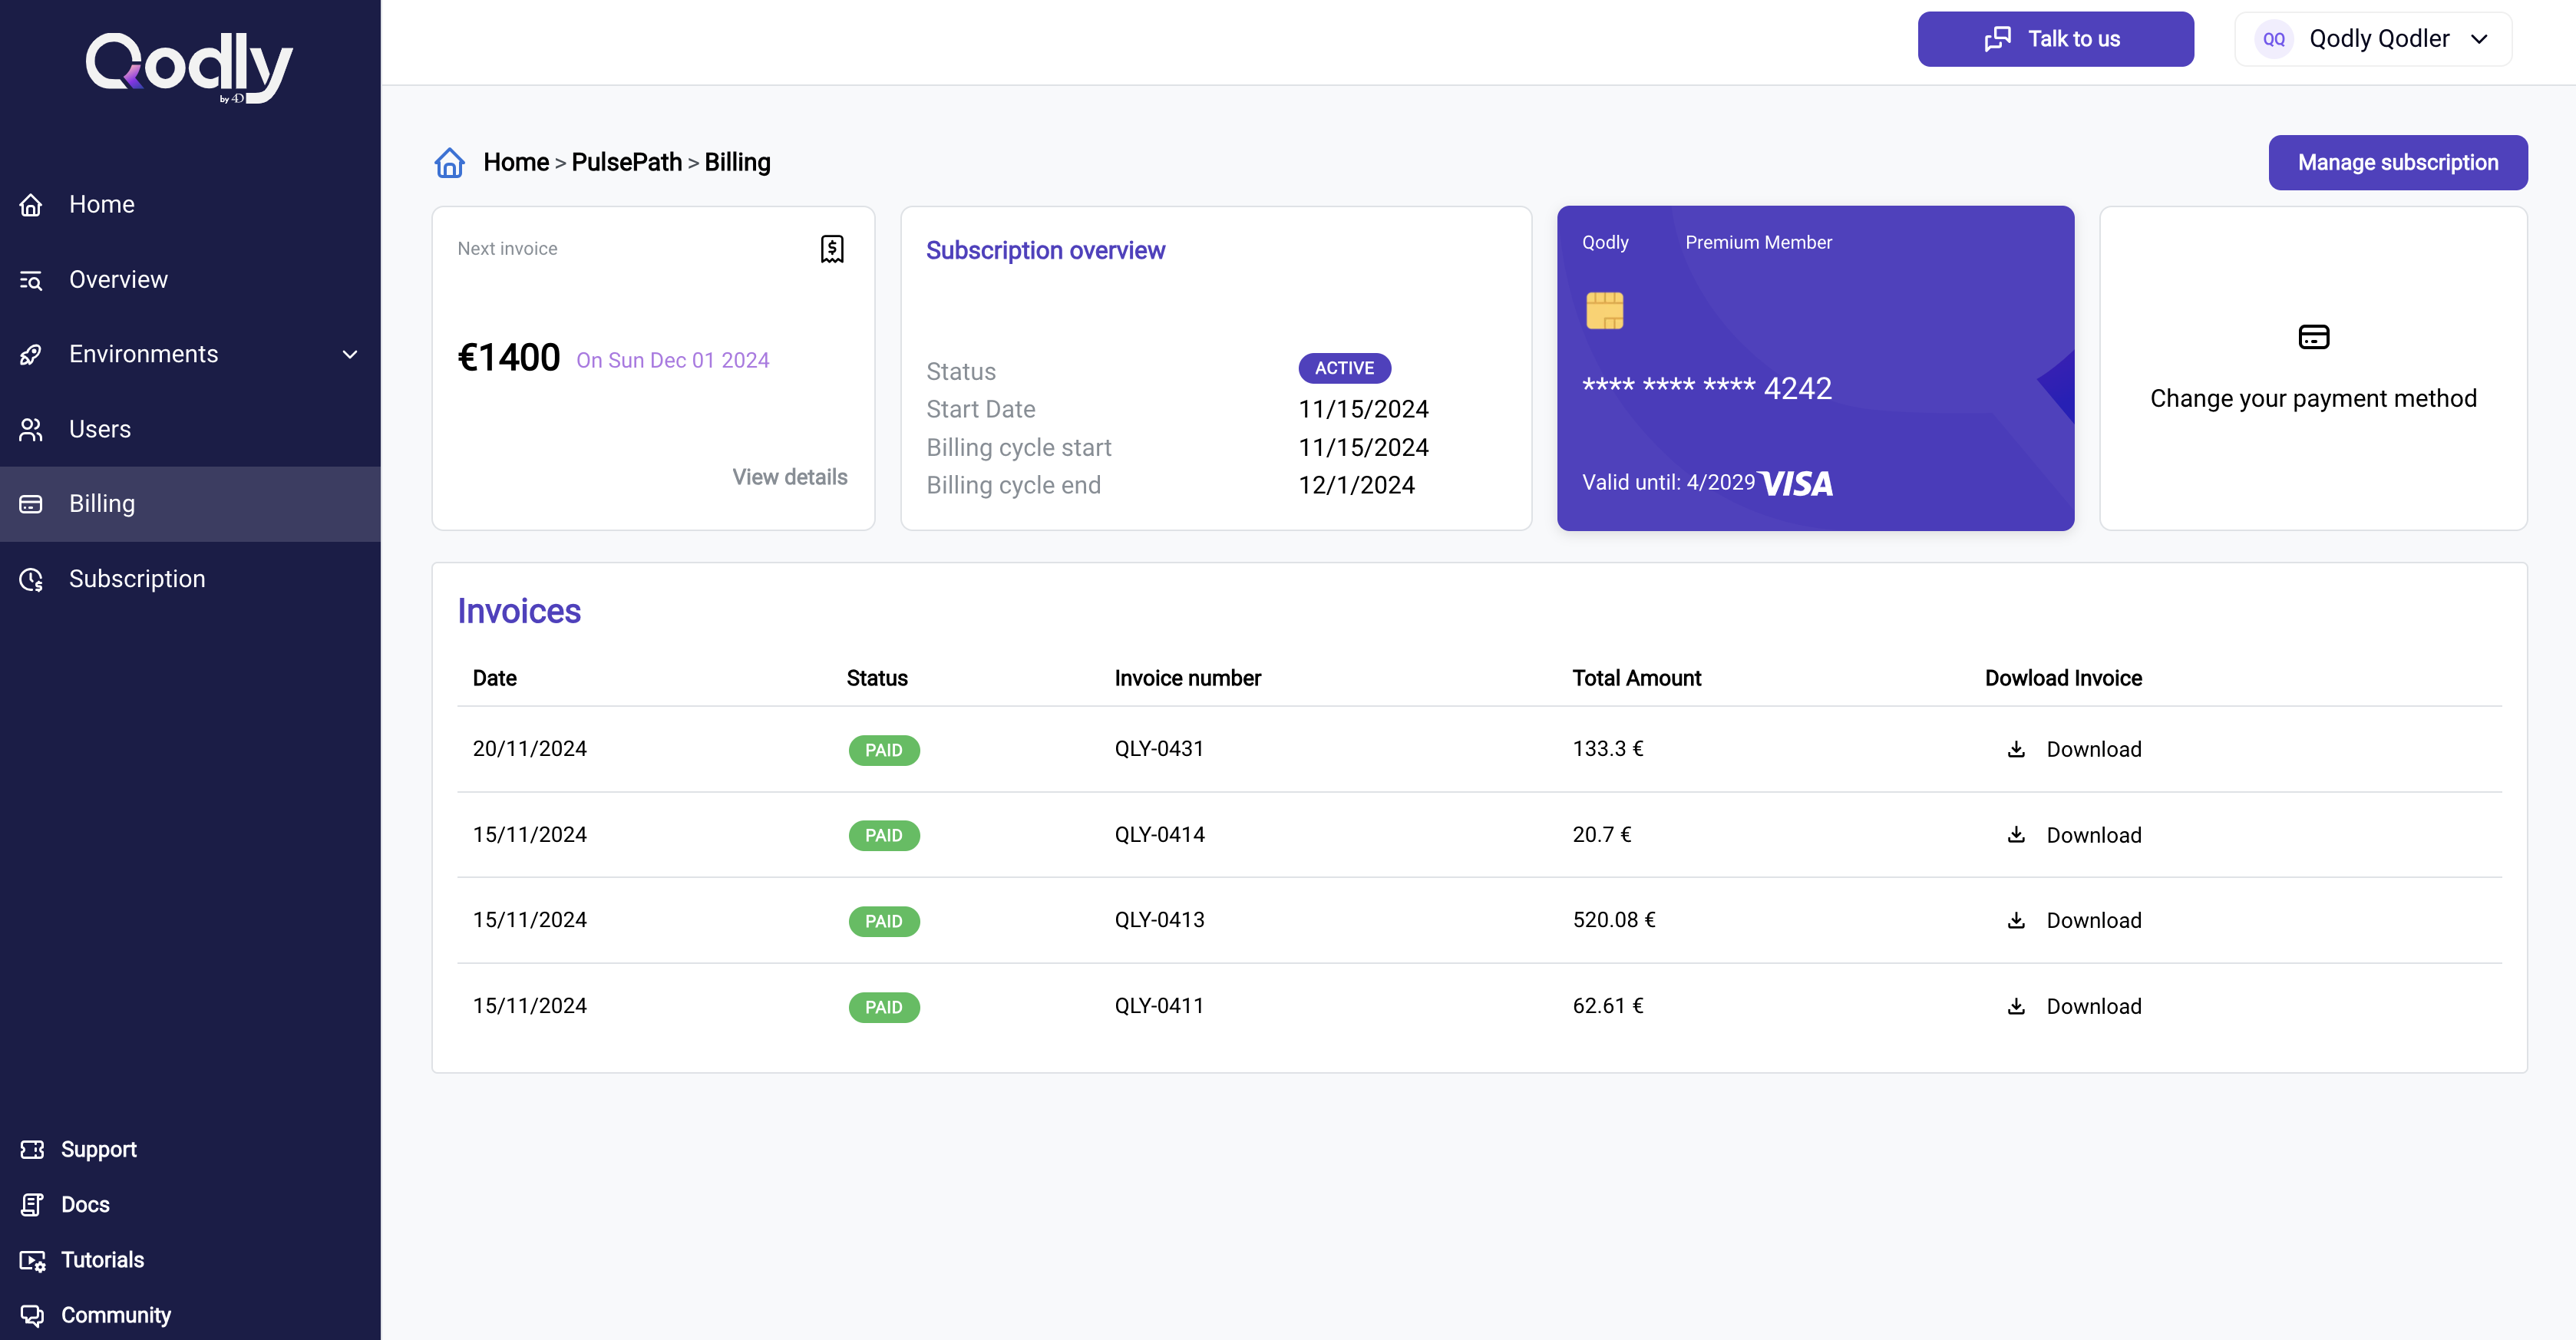
The Billing Page provides a detailed overview of your current subscription, payment methods, and past invoices. It is designed to give you control over payment details and an understanding of upcoming charges.
Next Invoice
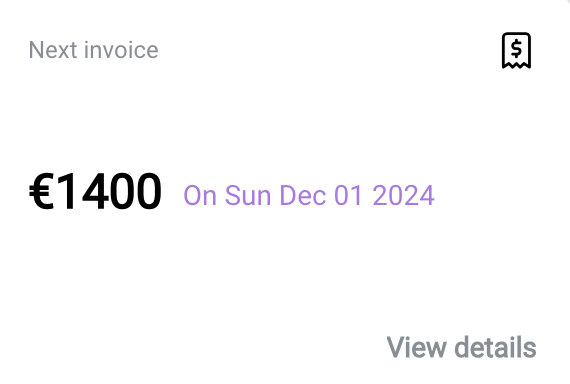
The Next Invoice section displays the amount and date of your next scheduled payment, with the option to view a detailed breakdown.
- Amount: The total cost of the upcoming invoice.
- Billing Date: The scheduled date for the next payment.
- View Details: Opens a breakdown of the invoice, showing the following details:
- Description: Items included in the subscription, such as: Qodly Power (computing resources), Storage extensions, and the Internet outbound data transfer packs.
- Quantity: Amount of each resource being billed.
- Unit Price: The price per unit of each resource.
- Total: The cost for each resource and the total sum of all charges.

Subscription Overview
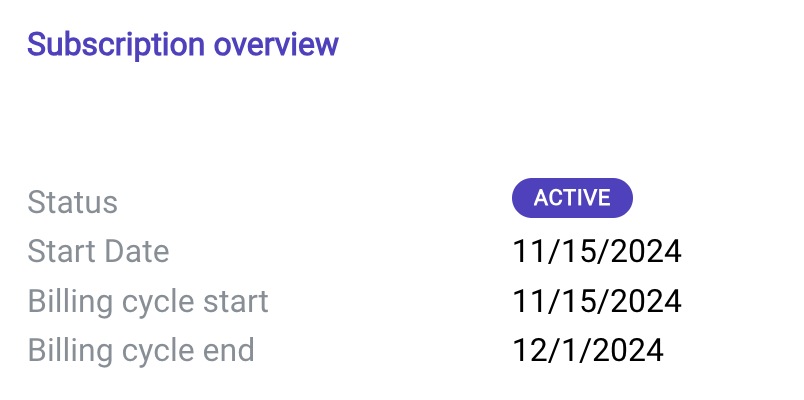
This section provides the status and cycle of your subscription, along with the associated payment method.
- Status: Indicates whether the subscription is active or inactive.
- Start Date: The date your subscription began.
- Billing Cycle Start/End: Defines the current subscription cycle's start and end dates.
- Payment Method: Displays the card currently linked to your subscription.
Change Payment Method
Clicking the Change Payment Method card  opens a dialog box where you can update the card details, including:
- Email: The associated email address.
- Card Number: The new payment card details.
- Expiration Date and Security Code (CVC).
- Country: The billing country for the card.
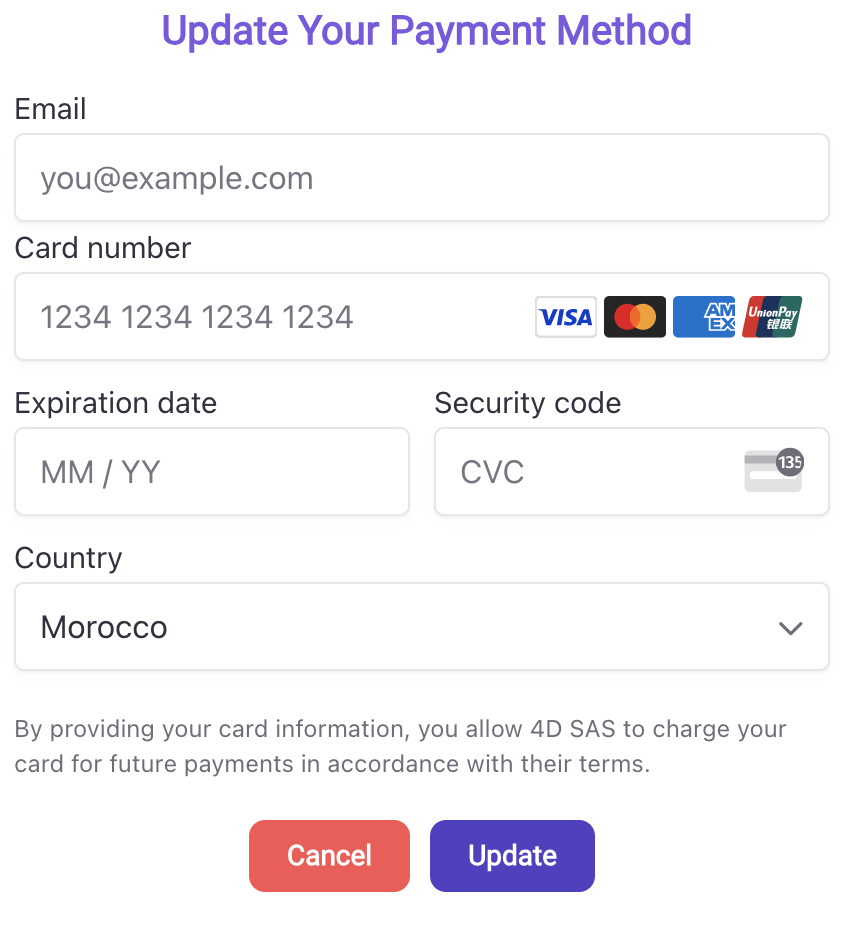
Updating the payment method ensures the next payment is processed without interruptions.
Invoices
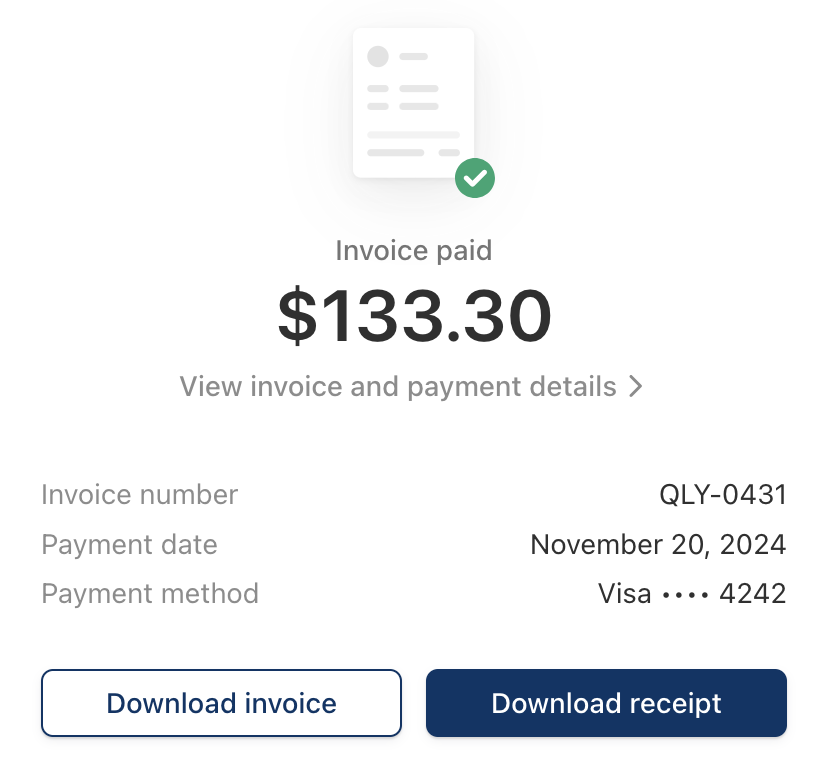
The Invoices section lists past invoices with downloadable options for receipts and invoice details:
- Date: When the invoice was issued.
- Status: Displays whether the invoice has been paid.
- Invoice Number: A unique identifier for each invoice.
- Total Amount: The total charge for that invoice.

Clicking the Download Invoice button redirects you to a detailed invoice page where you can:
- Download Invoice: Get a PDF copy of the invoice for record-keeping.
- Download Receipt: Obtain a receipt for accounting or reimbursement purposes.
Manage Subscription
The Manage Subscription  button directs you to the Subscription Page, where you can manage services and environments, including upgrading or deleting environments.
Subscription Page
The Subscription Page is designed for managing environment-specific services and associated costs. It allows you to upgrade, delete, or add environments, providing detailed control over the resources allocated to each environment.
Environment Overview
The Environment Overview section lists all environments with details of their configurations and associated costs.
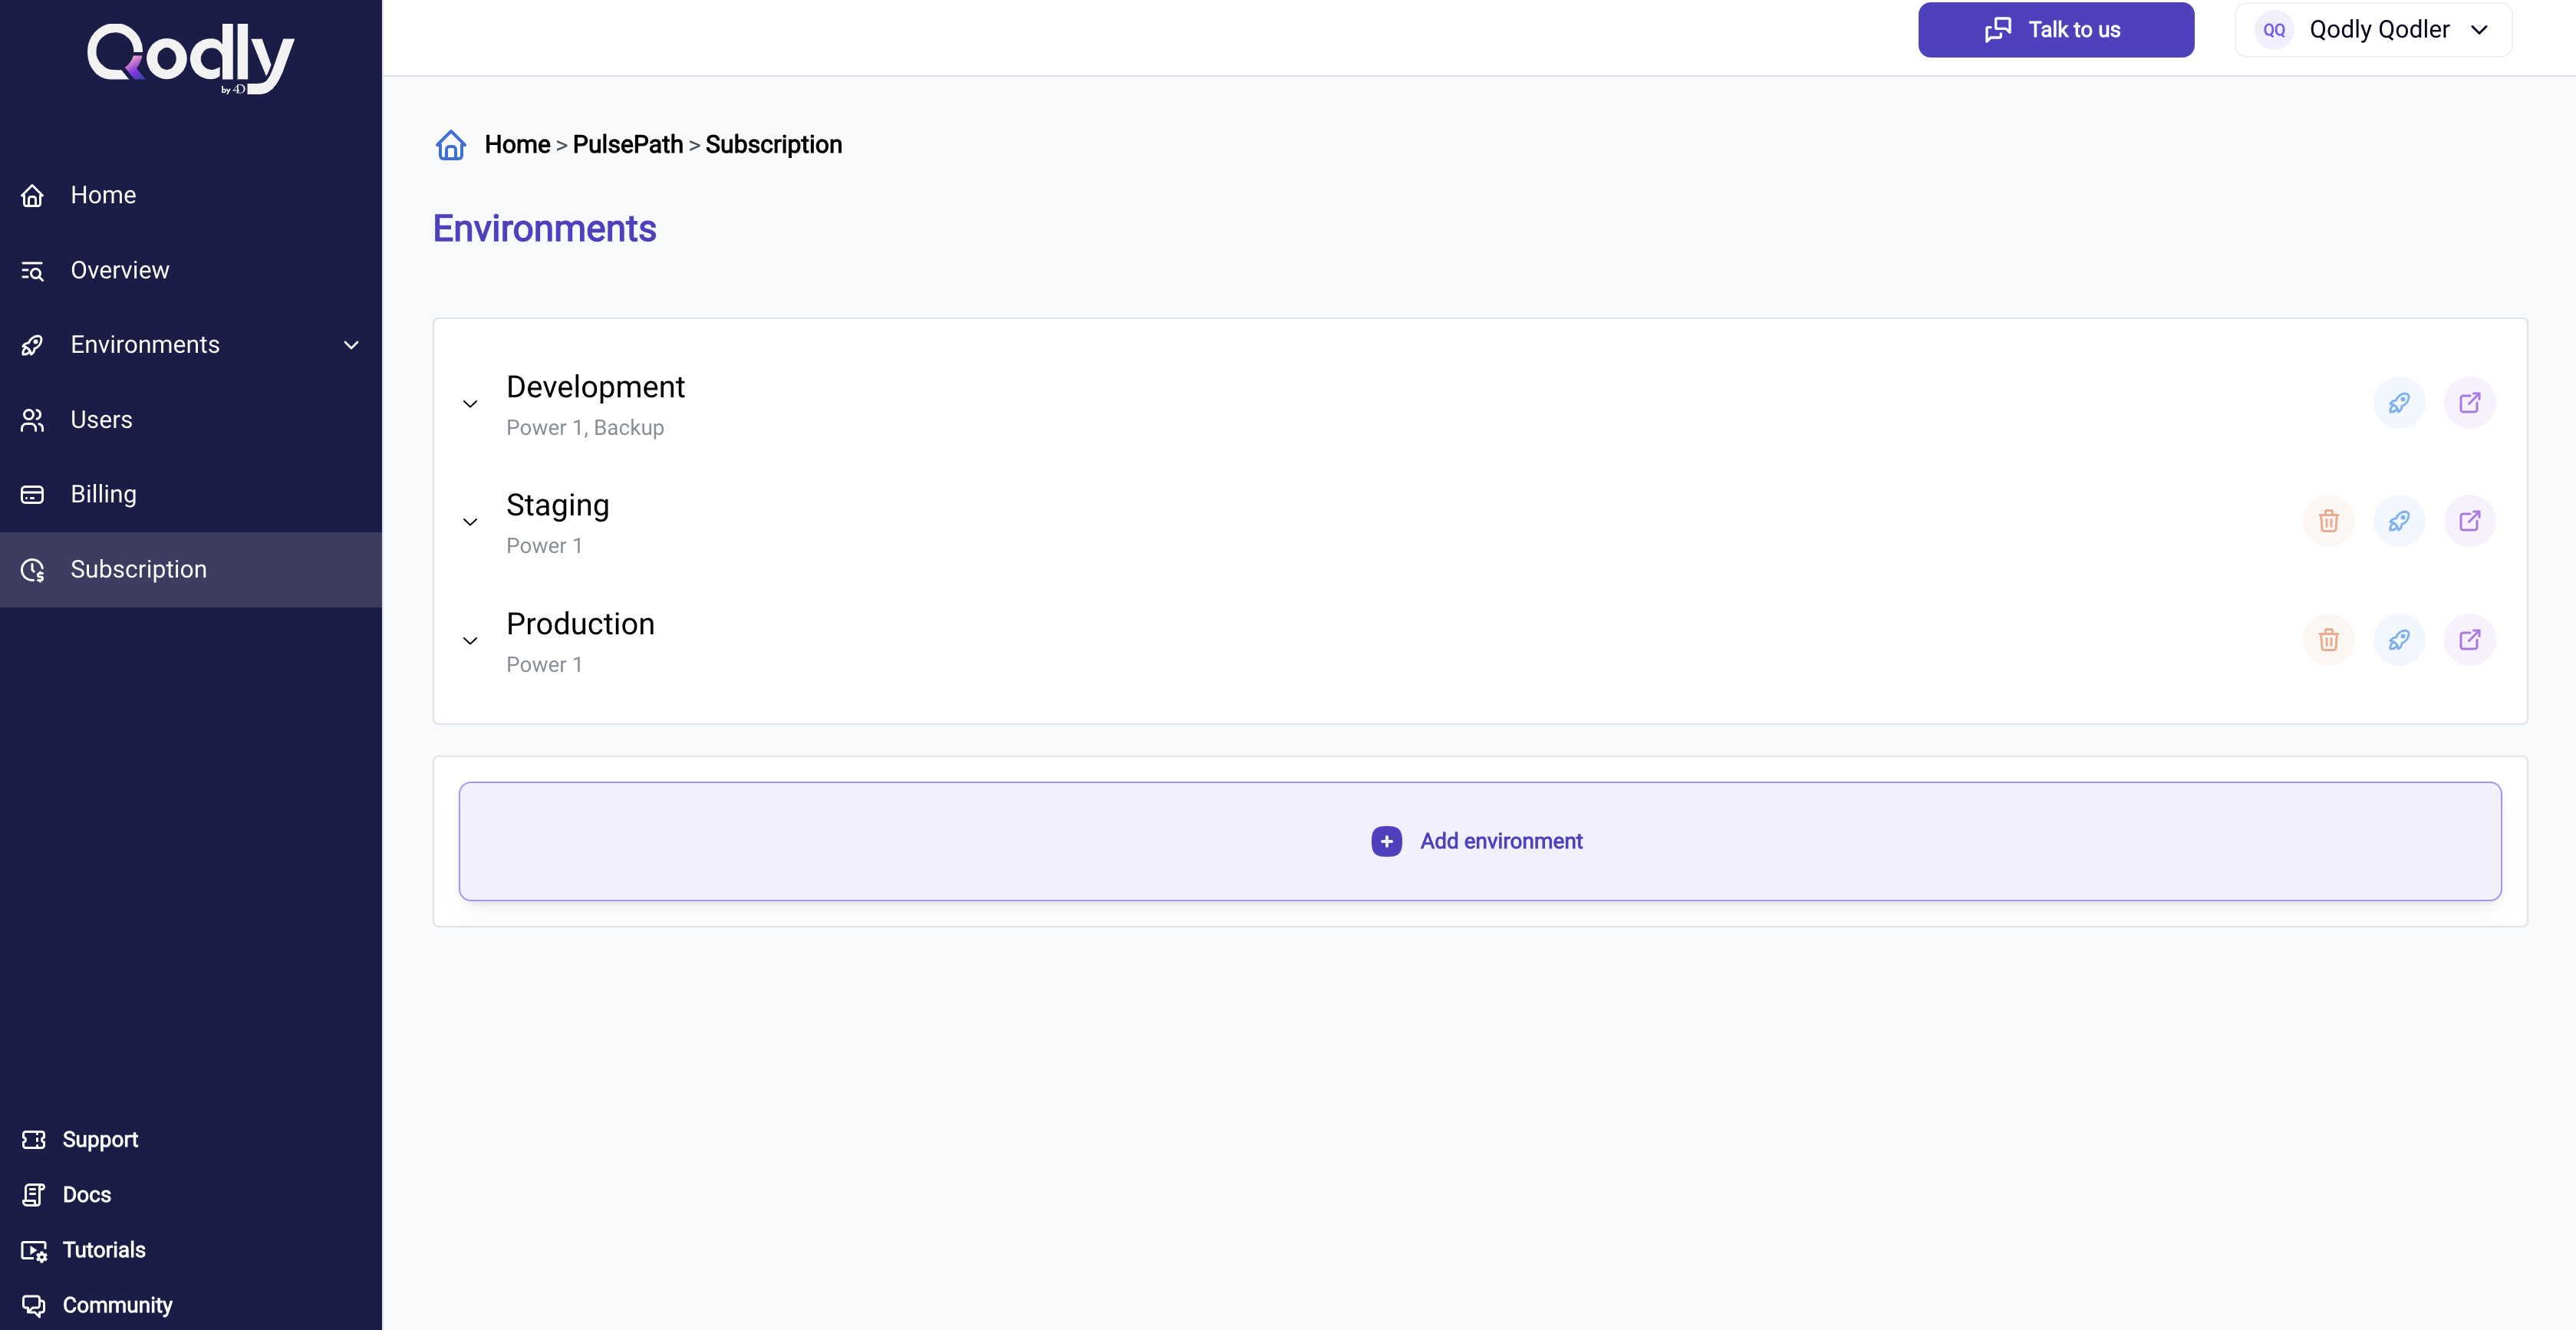
Clicking on an environment card reveals detailed configurations and associated costs for the environment:
- Qodly Power: Displays the computing resources (CPU and memory) assigned to the environment, along with the monthly cost.
- Extra Storage: Shows any additional storage allocated to the environment.
- Internet Outbound Data Transfer Pack: Indicates the bandwidth included for outbound data transfers.
- Backup Service: Displays if the database backup option is enabled.

Add Environment
The Add Environment  button enables the creation of new environments. Users can:
-
Add multiple environments in one session.
-
Customize each environment with specific computing power, storage, bandwidth, and additional services.
-
Review configuration summaries and total costs before finalizing.
-
Either submit
all configured environments or discard
the entire session.
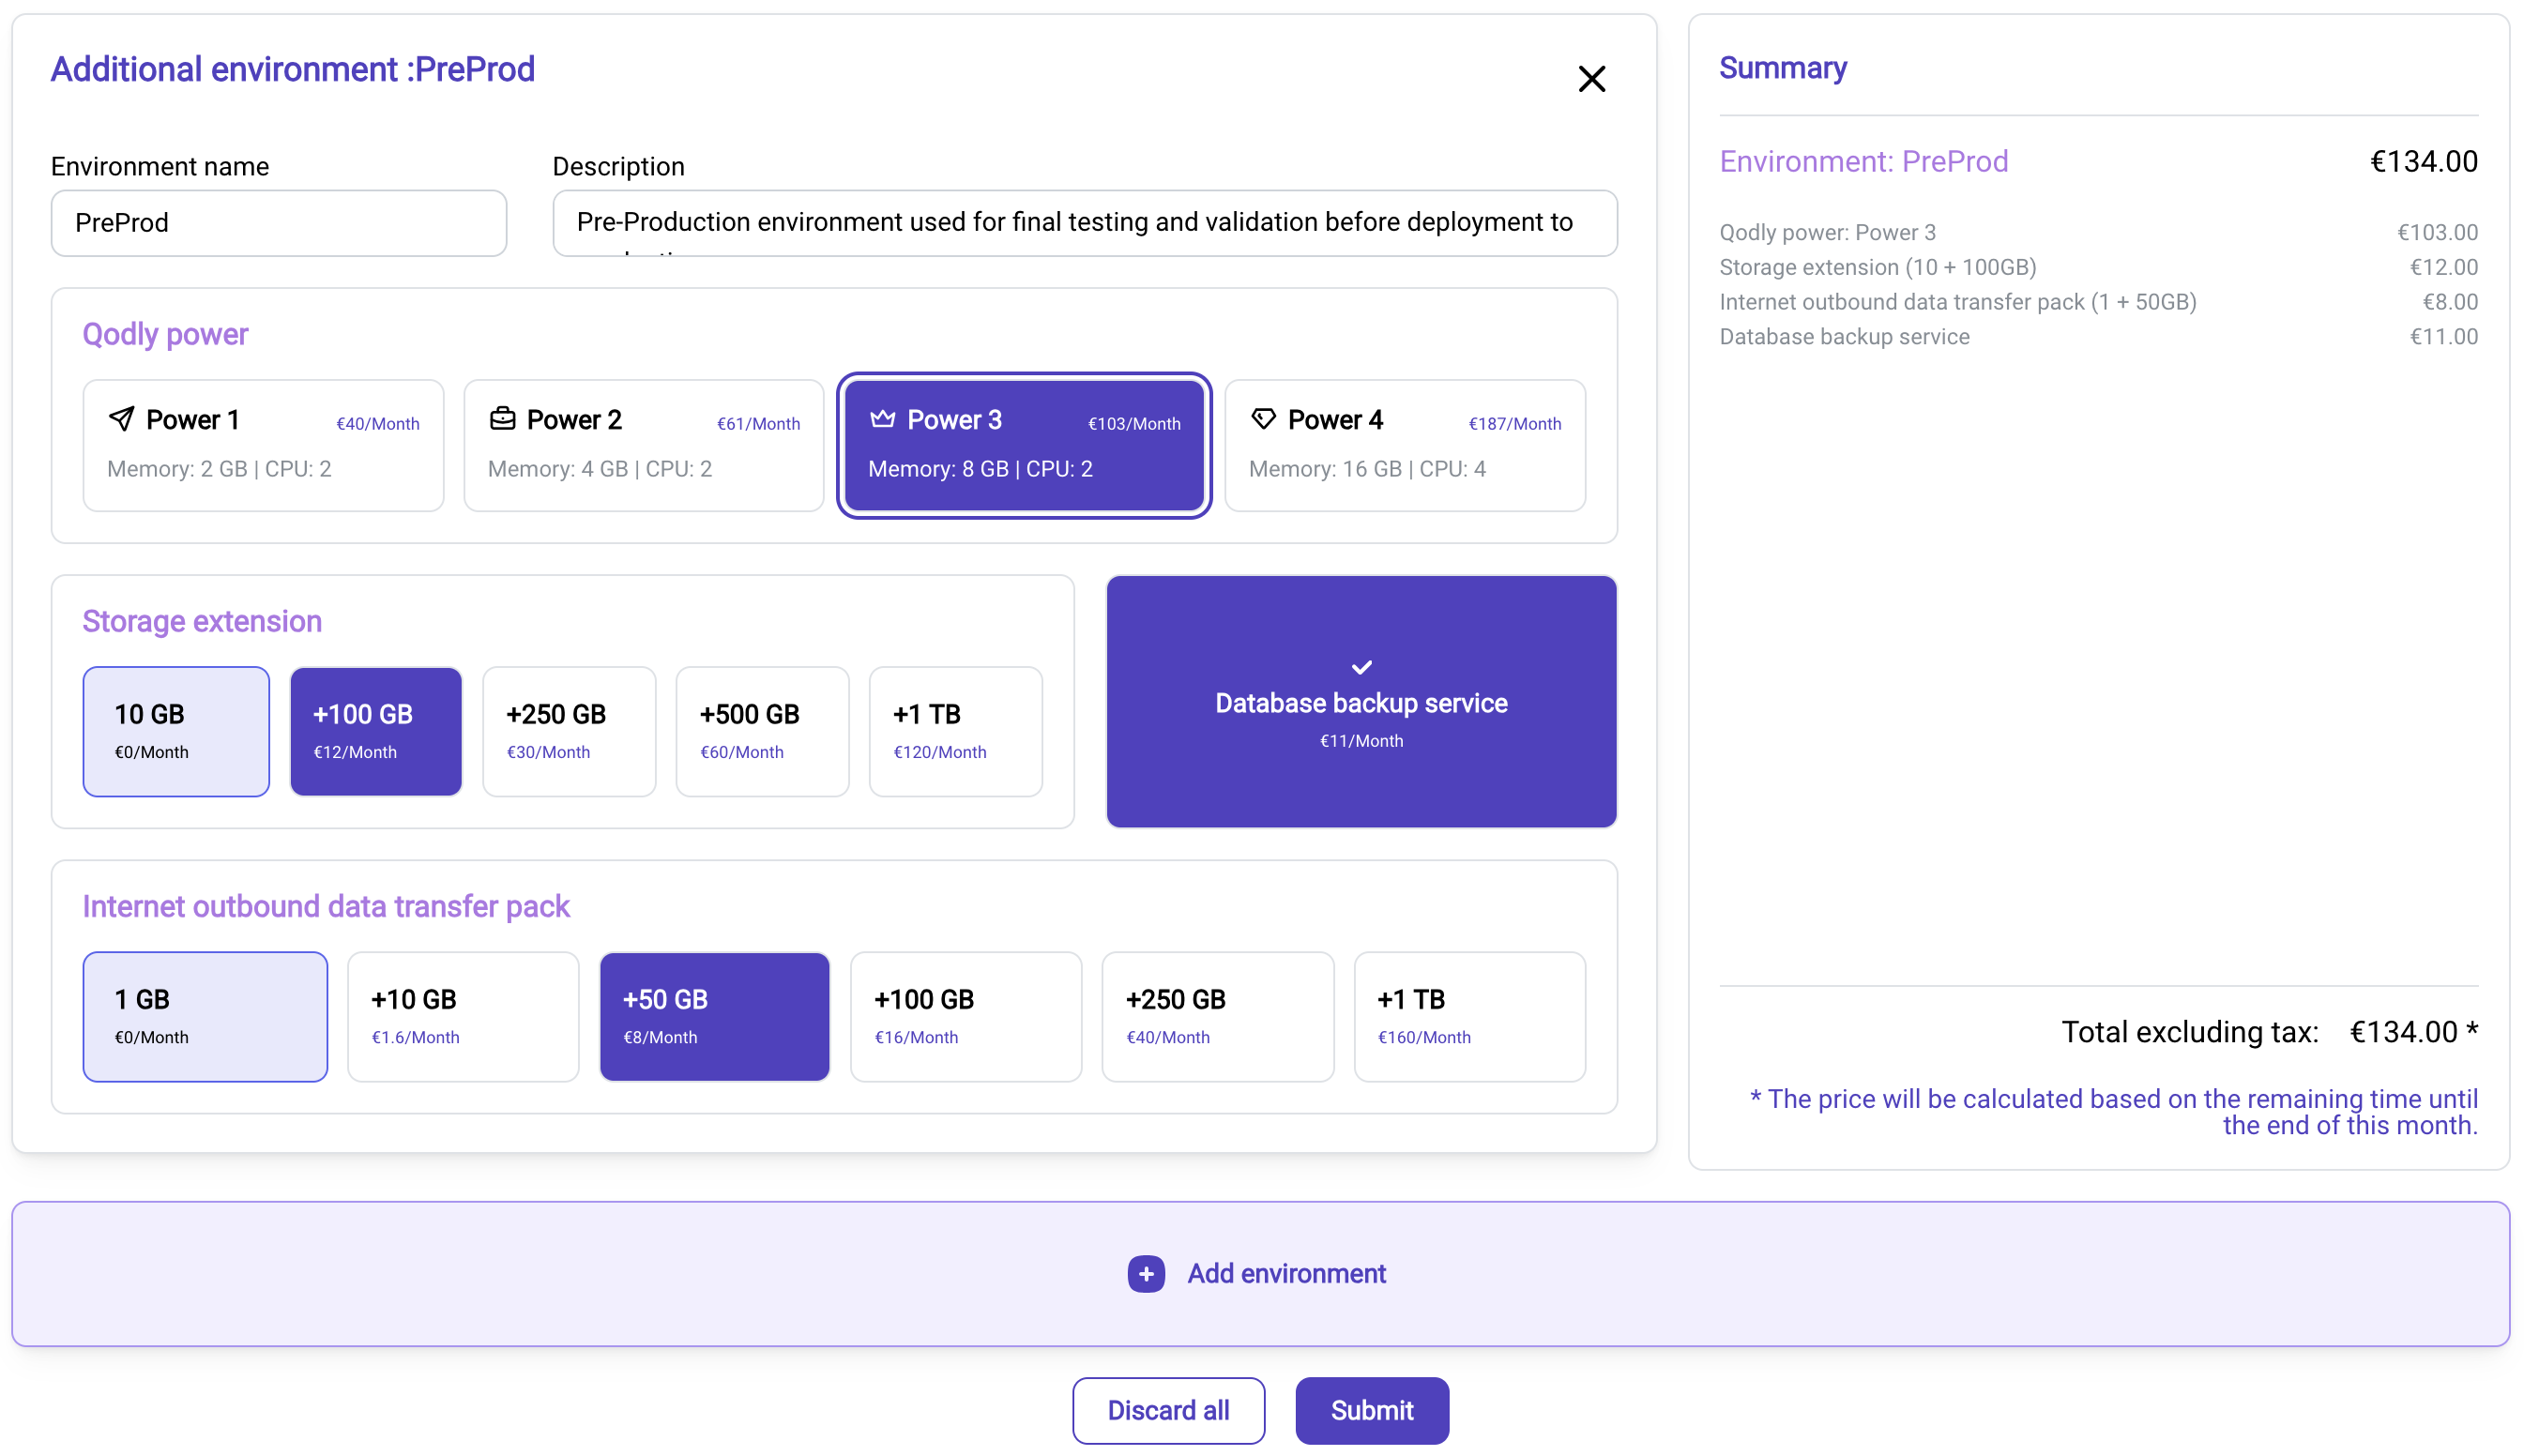
The configuration options for each environment in this section are the same as those in the Step 3: Configure Application Details section when creating a new app for the first time. Each added environment requires independent configuration, including options for:
View Environment
The View Environment button opens the selected environment’s overview page for further details and monitoring.
Upgrading an Environment
The Upgrade button opens a configuration panel where you can adjust the resources allocated to a specific environment, enhancing its capabilities based on your project needs.
The current configuration settings for the environment are pre-selected by default, making it easy to adjust specific elements as needed.
The upgrade panel includes the Environment Configuration options, consistent with the settings available in the Step 3: Configure Application Details section during initial app creation. Changes can be applied by clicking "Save Changes"  or discarded by selecting Cancel
 .
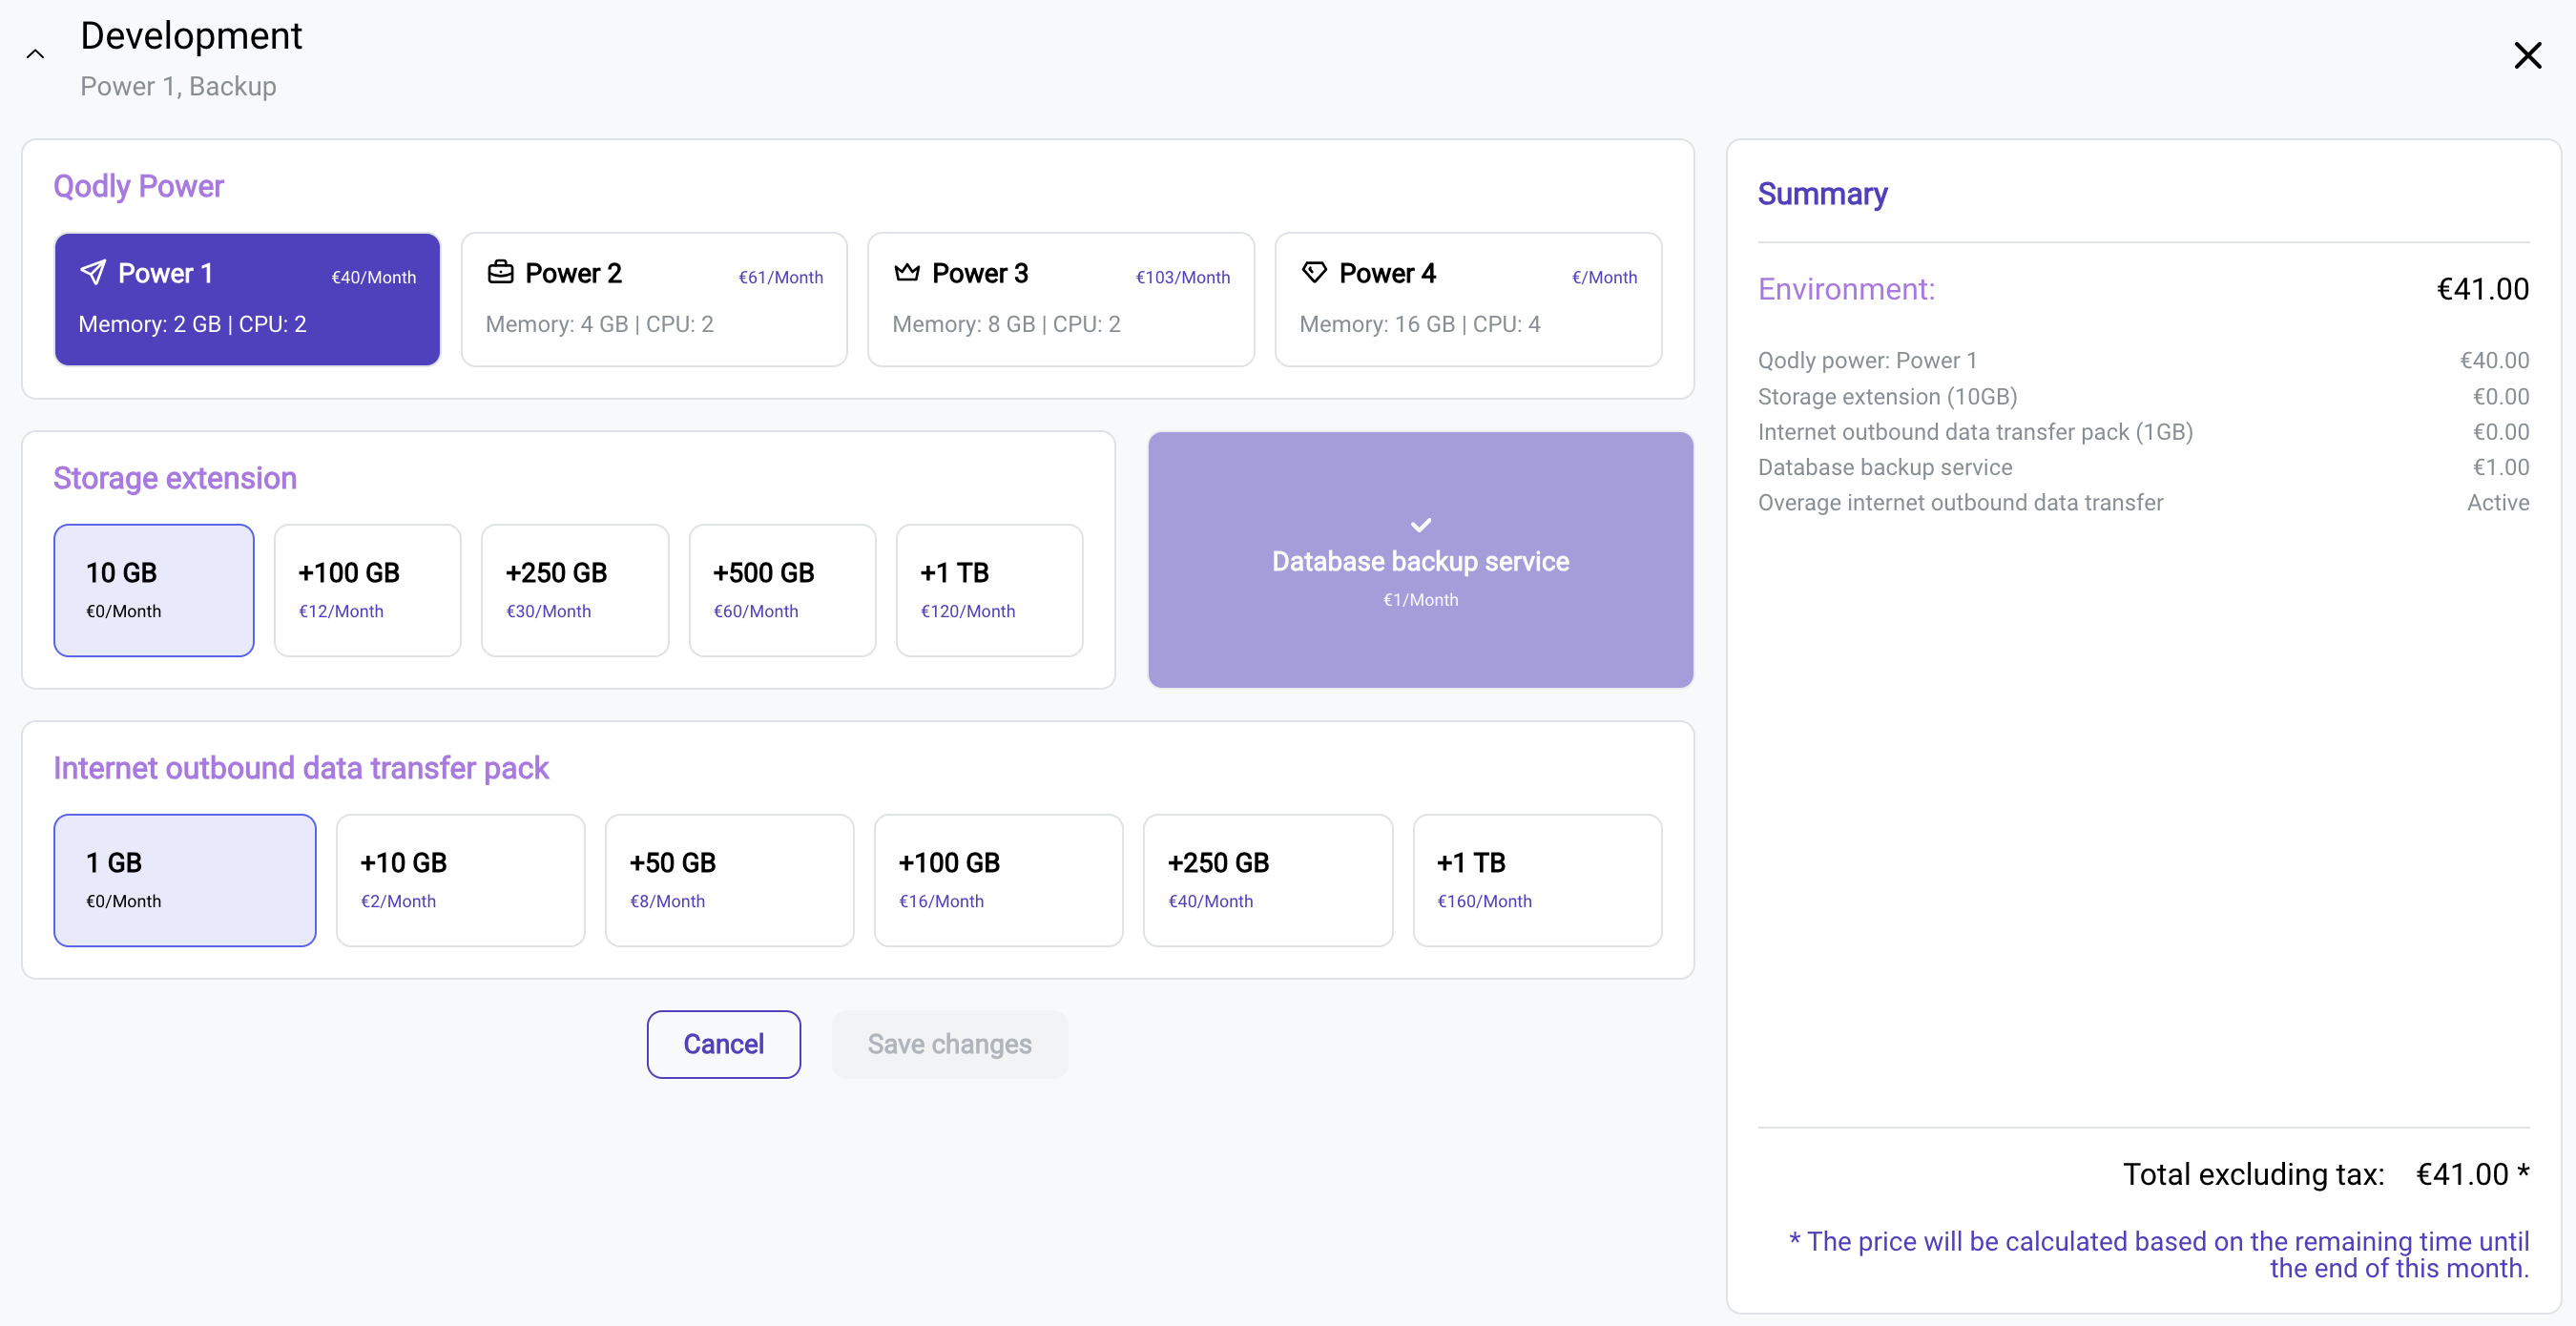
Billing adjustments are prorated for the remaining duration of the current billing cycle, as displayed in the summary panel to the right.
If the Database Backup Service was enabled during the initial creation of the environment, it remains locked and cannot be deselected in the upgrade configuration.
Deleting an Environment
The Delete button removes the selected environment (except Development) after confirmation:
- Available for all environments except Development.
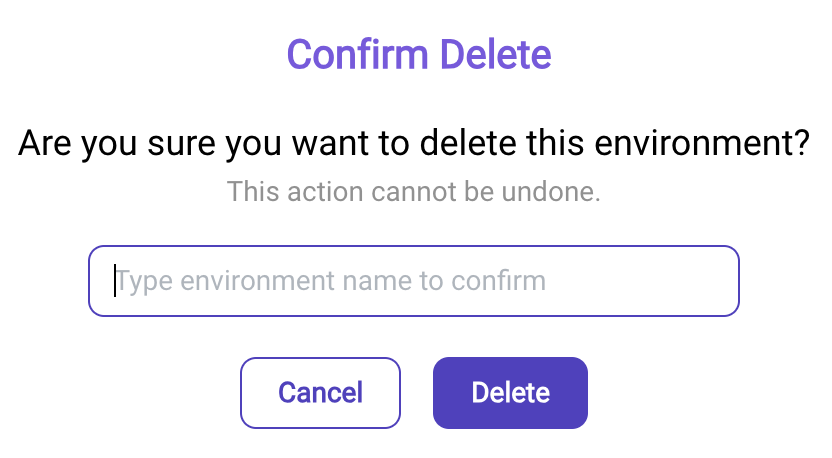
- Requires entering the environment name in a confirmation dialog to prevent accidental deletions.
- Once deleted, the environment and its associated resources are removed, and the subscription is updated.
