Project Setup
Qodly's API simplifies the creation of Custom Components using React through its dedicated CLI tool, @qodly/cli. This API streamlines the initiation of the React project, allowing developers to build and share reusable custom components within the Qodly community, providing a user-friendly integration into Pages through a straightforward drag-and-drop mechanism.
Initial Setup
Prerequisites
Before setting up your React project, make sure your development environment meets the following prerequisites:
- Node.js version 20 or above.
- npm version 10 or above.
Project Initialization
Open your terminal and execute the following command to initiate a new project:
npx @qodly/cli init
This command utilizes the Qodly CLI tool to set up the initial project structure.
Follow the prompts to name your project, e.g., "qodly-example".
Installing Dependencies
Navigate to the generated project folder (e.g., "qodly-example") using the terminal:
cd /folderPath/qodly-example
Then install the necessary npm dependencies:
npm i
Configuring Environment
To ensure the smooth operation of the Standalone Page Editor, you can choose between running a Cloud instance or a 4D instance. Each setup has specific requirements for setting up and running your development environment.
Run a Cloud Instance
To utilize a Cloud instance of the Qodly platform, it's essential to configure environment variables that allow your custom components to communicate securely:
-
API_KEY: Bound to the Administration port, crucial for accessing administrative features securely.
-
PROXY_SERVER: Specifies the API endpoint, critical for connecting your application to the backend services.
These variables should be set within environment configuration files located at the root of your project, adjacent to package.json. Here's how to do it:
- Create Environment Files: Depending on your deployment stage, you might have
.env.developmentfor development settings and.env.productionfor production settings.

- Add Variables to the Files:
API_SECURE= true
API_KEY=<your_api_key>
PROXY_SERVER=<your_proxy_server>
Ensure to keep your API_KEY secure and never expose it in client-side code where unauthorized users could access it.
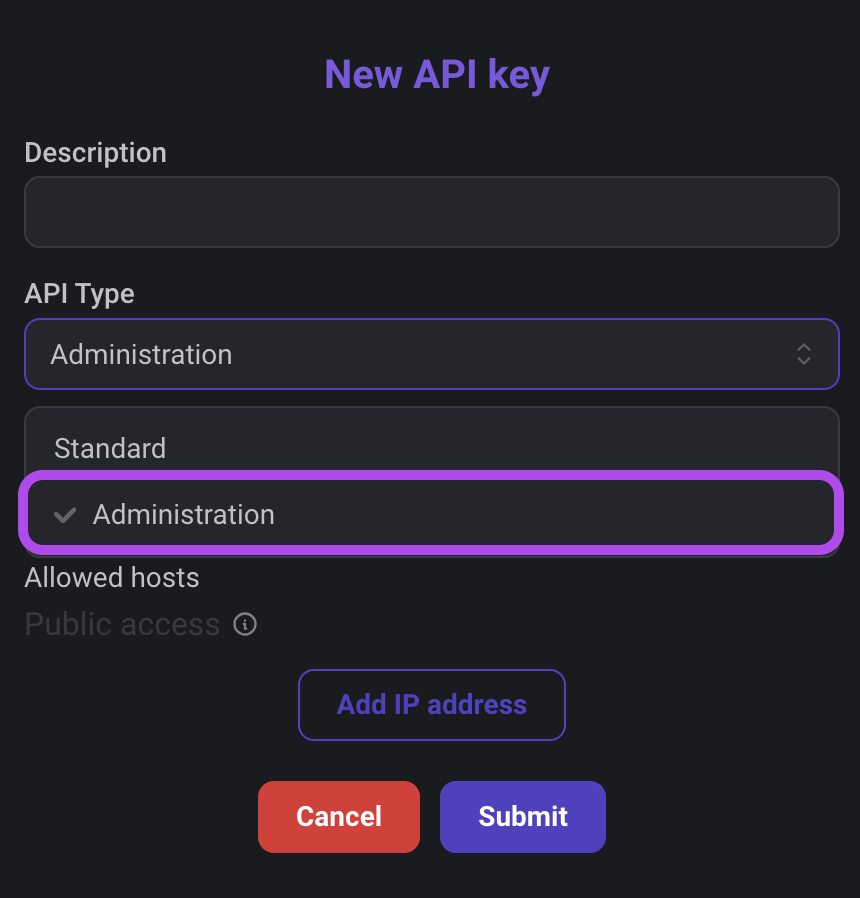
Ensure the API_KEY is of type "Administration" to access administrative features securely. This key should never be exposed in client-side code to prevent unauthorized access.
Run a 4D Instance
To operate a 4D instance effectively, you need to run a 4D Web Server alongside your React project. Failing to do so can lead to connection issues that prevent the Page Editor from functioning correctly.
If the 4D Web Server is not running, you might encounter the following error in your terminal:
[vite] http proxy error: /rest/$catalog/$all
Error: connect ECONNREFUSED 127.0.0.1:7443
    at TCPConnectWrap.afterConnect [as oncomplete] (node:net:1595:16)
This error indicates that your local server setup is trying to connect to a 4D instance at 127.0.0.1:7443 but cannot establish a connection, resulting in the Standalone Page Editor not loading.
Dependencies Overview
Production Dependencies
Below is an overview of the production dependencies listed in the package.json file:
| Dependency | Description |
|---|---|
@ws-ui/webform-editor | Provides the Page Editor functionality for Qodly, allowing developers to create and edit Pages. |
react | A JavaScript library for building user interfaces, used in the project for creating custom components. |
react-dom | ReactDOM provides DOM-specific methods for React, enabling interaction with the DOM and rendering components. |
Development Dependencies
Below is an overview of the development dependencies listed in the package.json file:
| Dependency | Description |
|---|---|
@qodly/cli | Command-line interface tool for initializing and managing Qodly projects. |
@types/react | TypeScript type definitions for React, providing type information for React when using TypeScript. |
@types/react-dom | TypeScript type definitions for ReactDOM, providing type information for ReactDOM when using TypeScript. |
@typescript-eslint/eslint-plugin | ESLint plugin for TypeScript, identifying and reporting patterns found in TypeScript code. |
@typescript-eslint/parser | TypeScript parser for ESLint, allowing ESLint to lint TypeScript code. |
@vitejs/plugin-react-swc | Vite plugin for React with SWC, facilitating fast web development with React. SWC is a JavaScript/TypeScript compiler. |
@ws-ui/webform-editor-standalone | Standalone version of the Qodly Page editor, used for local development and testing. |
eslint | ESLint is a linter tool for identifying and reporting patterns found in ECMAScript/JavaScript code. |
eslint-config-prettier | ESLint configuration that turns off rules unnecessary or conflicting with Prettier. |
eslint-plugin-prettier | ESLint plugin for Prettier, allowing ESLint to run Prettier as an ESLint rule. |
eslint-plugin-react-hooks | ESLint plugin for React hooks, providing ESLint rules specific to React hooks. |
eslint-plugin-react-refresh | ESLint plugin for React refresh, offering ESLint rules related to the React refresh feature. |
typescript | TypeScript is a superset of JavaScript that adds static typing to the language. |
vite | Vite is a fast web development build tool supporting modern JavaScript and React. Used for local development and builds. |
Development Workflow
Running the Development Server
Launch Qodly Studio in local mode with only the Standalone Page Editor using the following command:
npm run dev
Used when actively developing your project. It provides a local environment where you can make changes and test components.
When you run npm run dev, it runs the server locally at:
Local: http://localhost:5001/
The project utilizes Vite for rapid development and efficient serving of the project in dev mode.
Building the Project
Build your project for production using the following command:
npm run build
Used to generate a production-ready build of your entire project, the build process creates a compressed folder named qodly_ID.zip with a uniquely generated ID.
The ID generated is established during the initialization of a new project and remains consistent throughout the project's lifecycle. As a result, each execution of the build ensures that the qodly_ID.zip folder contains the same generated ID.
Locate this compressed folder in your project directory, ready for drag-and-drop onto the upload feature in Qodly Studio for installation.
Generating a New Component
Add a new component to your project with the following command:
npm run generate:component
Follow the prompts to name the new component.
A project can contain multiple custom components, as in a custom Chart project with various components contributing to the final custom Chart.
The generate:component command internally executes qodly new component, which then generates the necessary files and folders for the component within the components directory.
Custom components must use unique names to avoid conflicts with Qodly Studio's built-in components. If a custom component shares the same name as a built-in component, the custom component will take precedence when dragged and dropped onto the Page editor.
The components directory serves as the repository for custom components:
- components
  - ExampleComponent
      - ExampleComponent.build.tsx
      - ExampleComponent.render.tsx
      - ExampleComponent.settings.tsx
      - ExampleComponent.config.tsx
      - index.tsx
While developers have the flexibility to implement their initial component in their preferred manner, adhering to the suggested structure is recommended
Refer to the custom component structure section for detailed information.