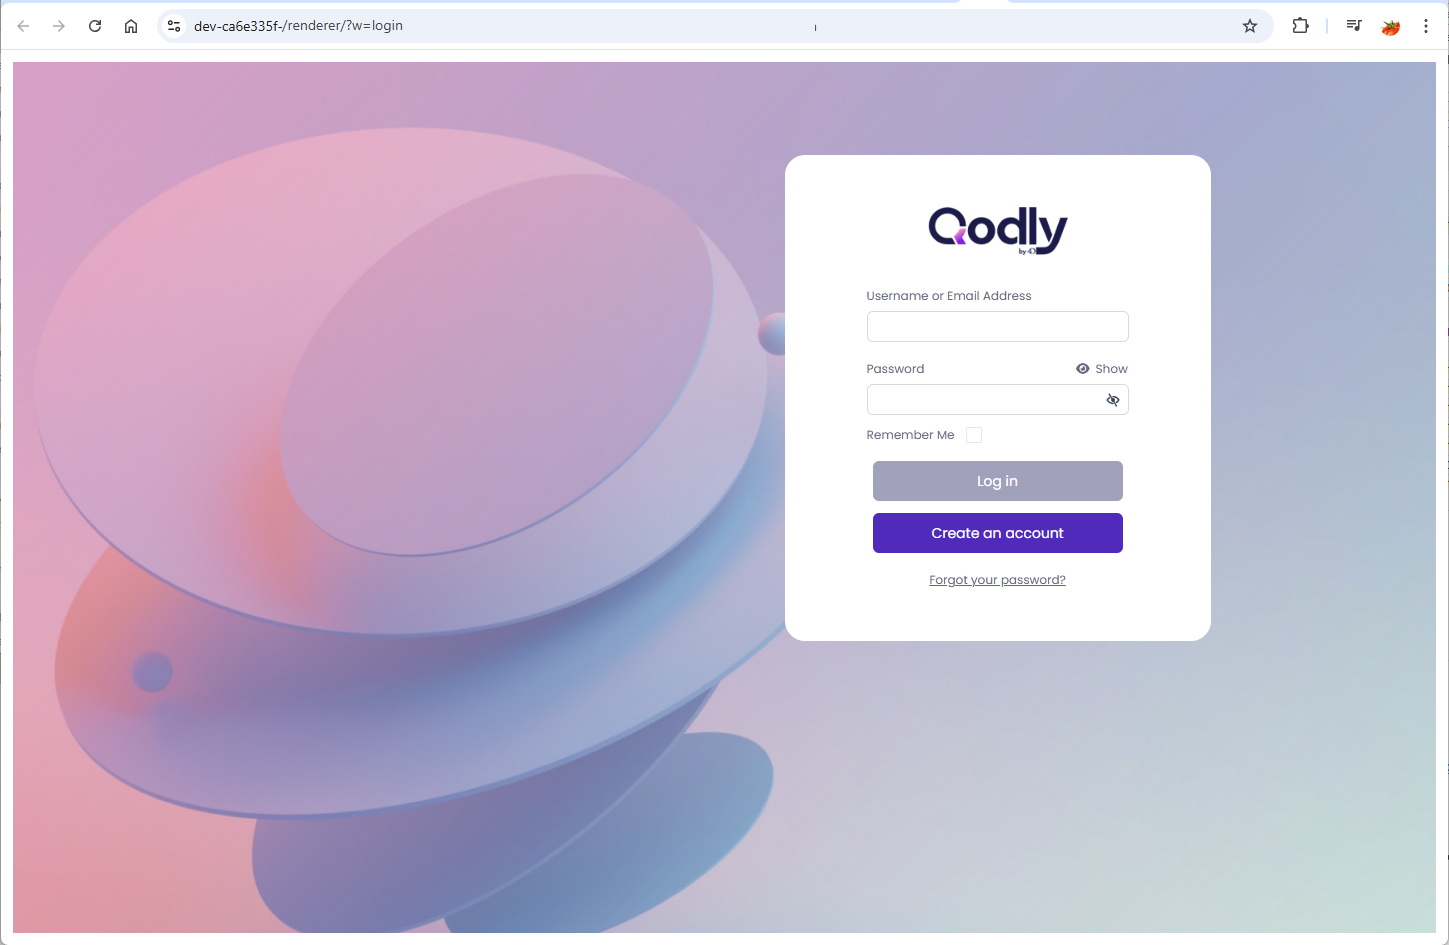
Creating a login page for public access
This section is a tutorial that will show you how to implement a simple login page for a Qodly app with public access enabled, i.e. for users NOT using the authenticated url.
The default page is a login form, requiring for a login and a password.
- In case of successful login, the user gets a "PublicAuth" role and is brought to a Welcome page.
- In case of wrong login or password, the user stays "guest" and remains on the login form where an error is displayed.
The difference between a logged in user and a guest is that guest cannot access the application data.
At every step of this tutorial, before testing the changes, do not forget to save your work so that the server can take your modifications into account. If things do not seem to work as expected, click on Save all and/or clear your browser cache.
Create a blank app
In your console, create a new blank app. Of course, you can also open an existing app of yours and adapt this tutorial.
Prepare Data
- In the Model editor, create two dataclasses, "item" and "user".
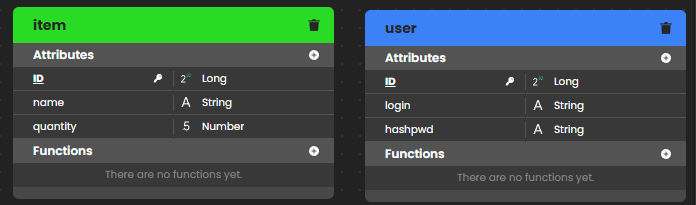
Items are the application business data. This data must not be available to anonymous/guest users.
Users are the public users list. Each user has a login and a hashed password.
- Create a few test data.
We will create 10 items and 1 user. To do so, create a method, name it for example "testData", paste the following code:
var counter : integer
var item : cs.itemEntity
var user : cs.userEntity

for (counter,0,10)
    item = ds.item.new()
    item.name = "item" + string(counter)
    item.quantity = 99
    item.save()
end

user = ds.user.new()
user.login = "john"
user.hashpwd = generatePasswordHash("secret password")
user.save()
... and run the method.
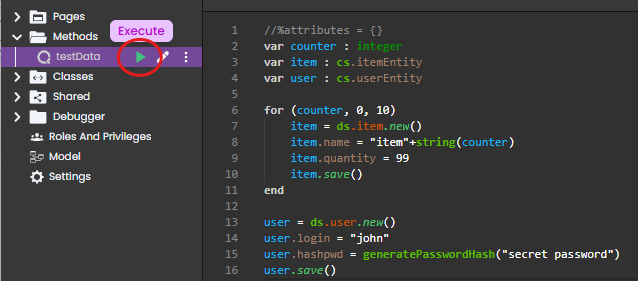
Note that for security, only a password hash is stored in the database.
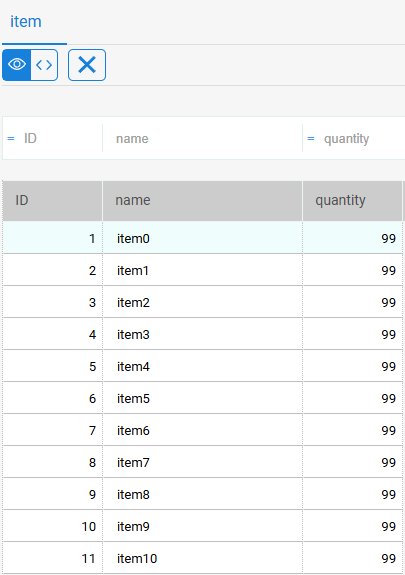
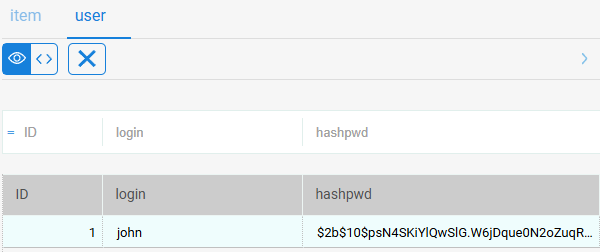
- In the Data explorer, you can verify that you now have some data:
Prepare Qodly Pages
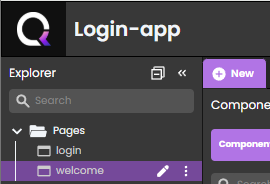
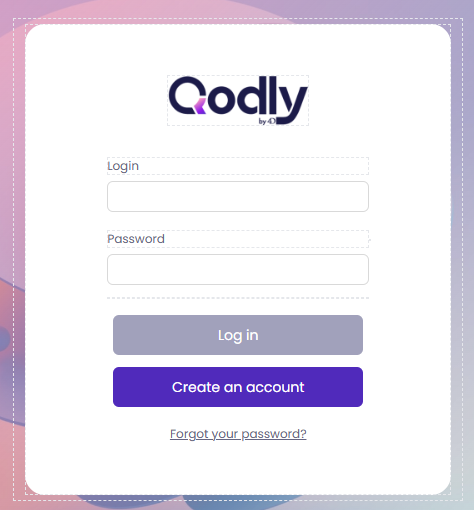
- Create two Qodly Pages: the first one called "login", the second one called "welcome".
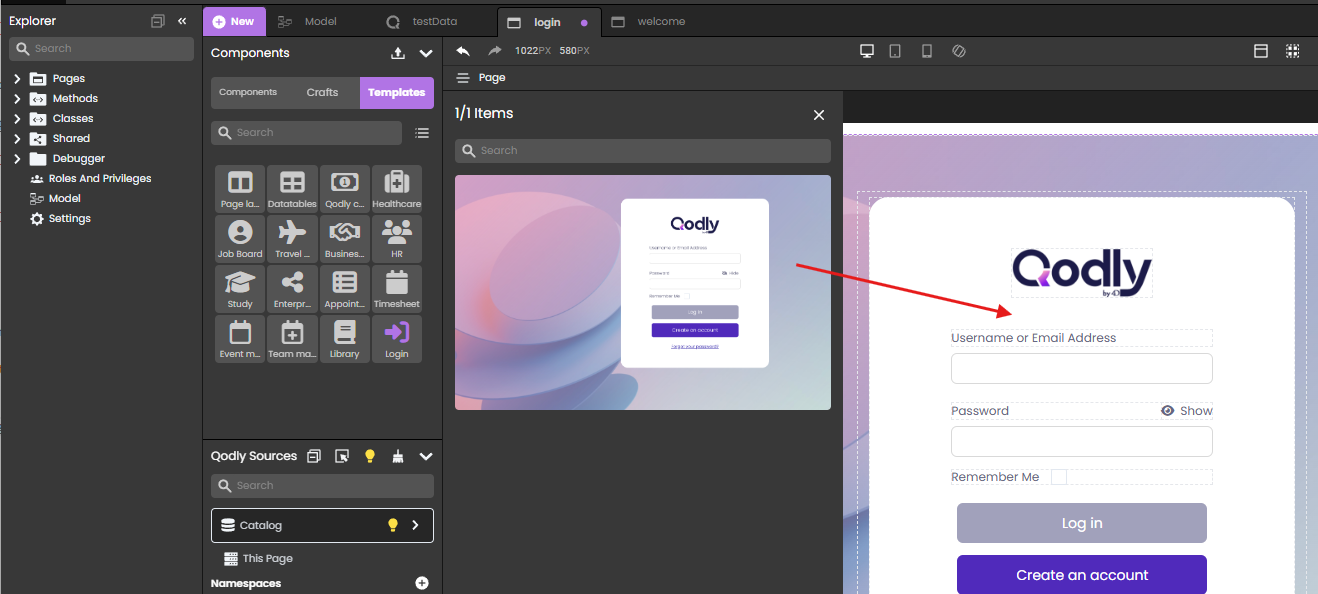
- Drag and drop the "Login" template on the login page (select the "Login" template and drop the template preview to the login page canvas).
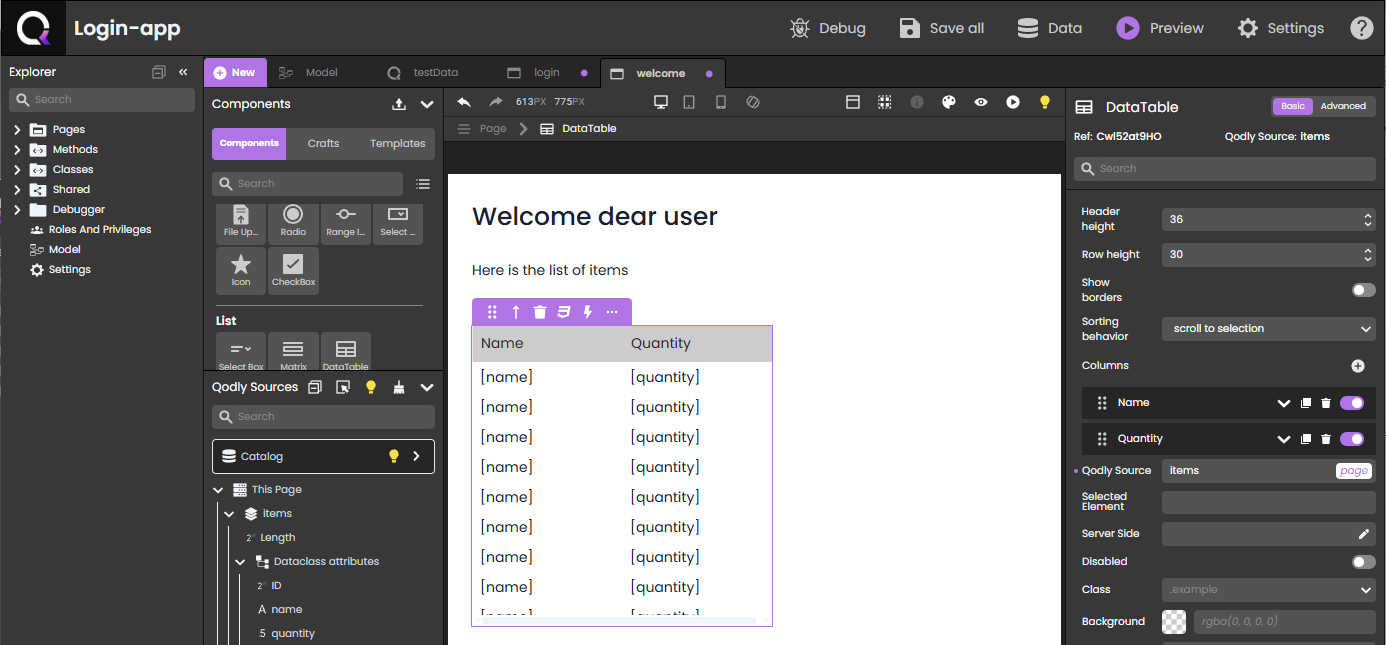
- On the welcome page:
- add a Text component and write a welcome message
- add a DataTable component, create a datasource "items" of type Entity selection and bind it to the DataTable.
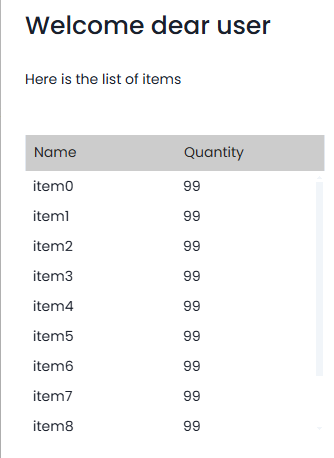
If you preview this welcome page, you obtain the list of items already existing in the database:
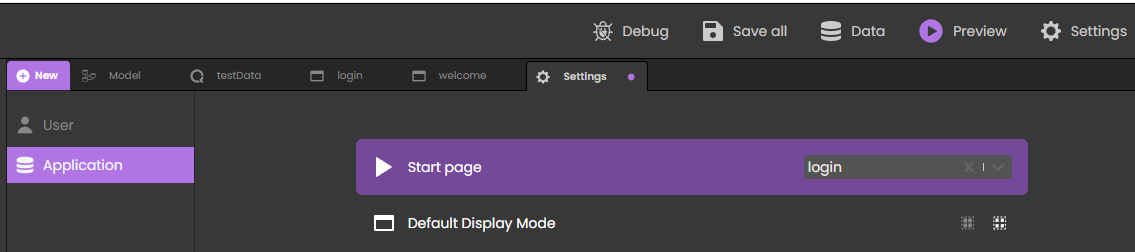
- Before continuing to the next section, setup your Start page to be the login page in your Qodly application settings:
Roles and privileges
Guest users are not authenticated. Thus, they should not access any data of the application (neither "users", nor "items").
To secure your datastore, create a new privilege called "none" and a grant it all permission actions on the ds resource (do not forget to save):

You will never give this privilege to any user, meaning that at this moment, nobody can reach any data of your application. Now if you render again your welcome page, items are no longer visible:

When you preview a Page inside Qodly studio, you are a WebAdmin. Privileges have no consequence for you, basically you have all privileges.

When you preview a Page in a new tab (or using the Preview button), then privileges matter. If you do so as a developer, from Qodly Studio, you usually have the Admin role.


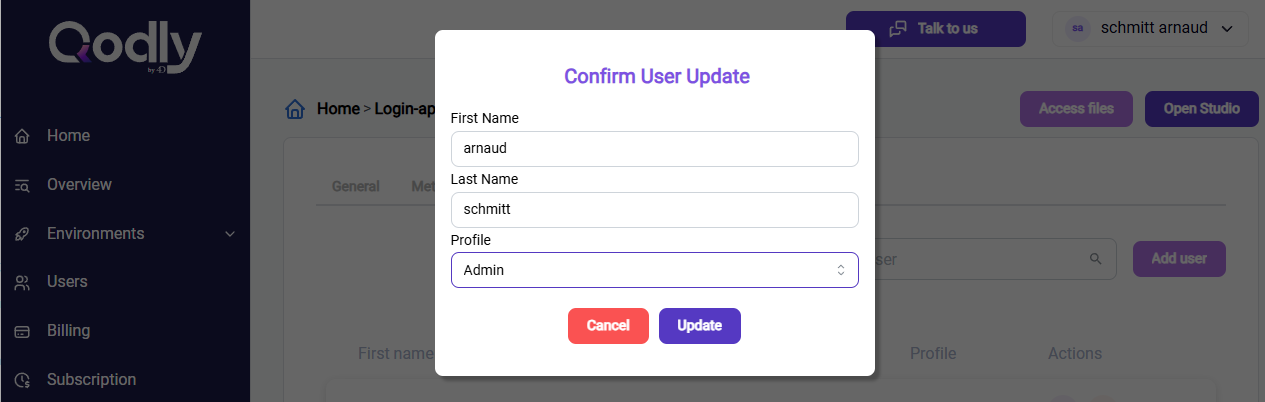
This role can be assigned in the Team section of your application console:
Now let's create a new privilege called "ItemAccess", and grant it the Read permission action on the item Dataclass:

Now switch to the Roles tab and create a role called "PublicAuth". Add the "ItemAccess" privilege to the "PublicAuth" role and also to the already existing "Admin" role. Later in this section, we will write a login() function that will give this role to your public users after a successful login.
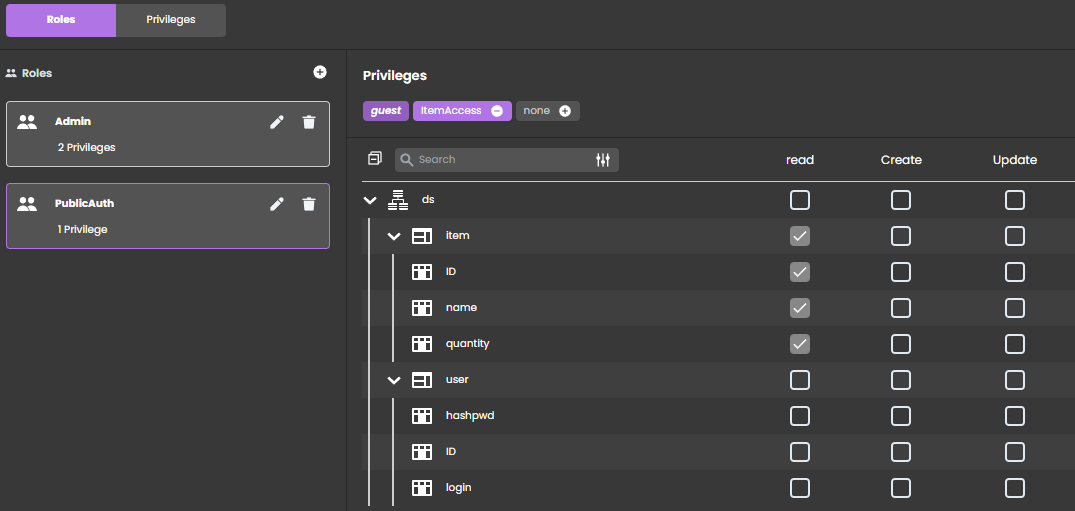
Now any users having one of these roles will have access to items in database.
To check the "Admin" role, preview your welcome page in a new tab. In the welcome page running under the "Admin" role, items are visible:
Enable public access
Unless you know what you are doing, it is obviously not recommended to activate Public access before having configured roles and privileges according to your needs.
Now that your data is secured, you can safely enable public access.
Open the General tab of your application console and select Activate public access:
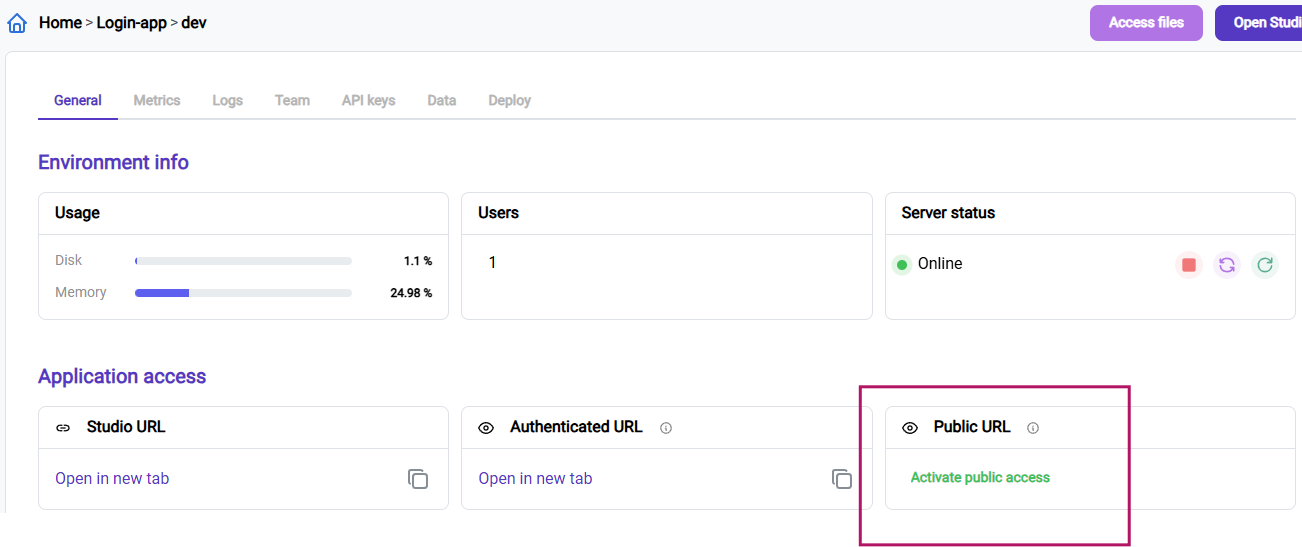
Click Confirm, you obtain a public URL:

If you click on it, the default page opens. This time, no Qodly authentication dialog is required. You directly arrive in your Qodly app as a guest, the Start page is displayed (i.e. the login page):
You might have to restart the server to get the start page for the first time after its assignment.
Being guest, if you try to open the welcome page, it is displayed but your data is secured. As stated before, in this example guests cannot access items in the database:
Implement the login mechanism
The challenge now is to make the login form work. The principle here is to check if credentials are correct, assign a role to the session, and bring the user to the welcome page.
First thing to do is to implement a login function. For this, we create a CheckUser singleton class.
//CheckUser Class
shared singleton constructor()

exposed function login (login: string, password: string)
    var user : cs.userEntity
    var privileges : object

    user = ds.user.query("login == :1", login).first()
    switch
        : (user == null)
            throw(9, "Could not signin, please check email and password")
        : (user && not(verifyPasswordHash(password, user.hashpwd)))
            throw(9, "Could not signin, please check email and password")
        else
            session.setPrivileges({roles: "PublicAuth"})
            webForm.setMessage("Login successfull")
    end
Do not forget to save.
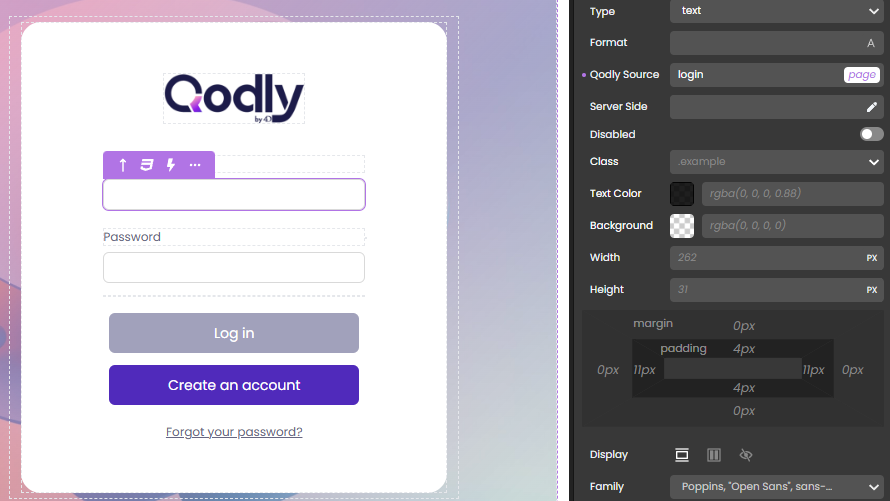
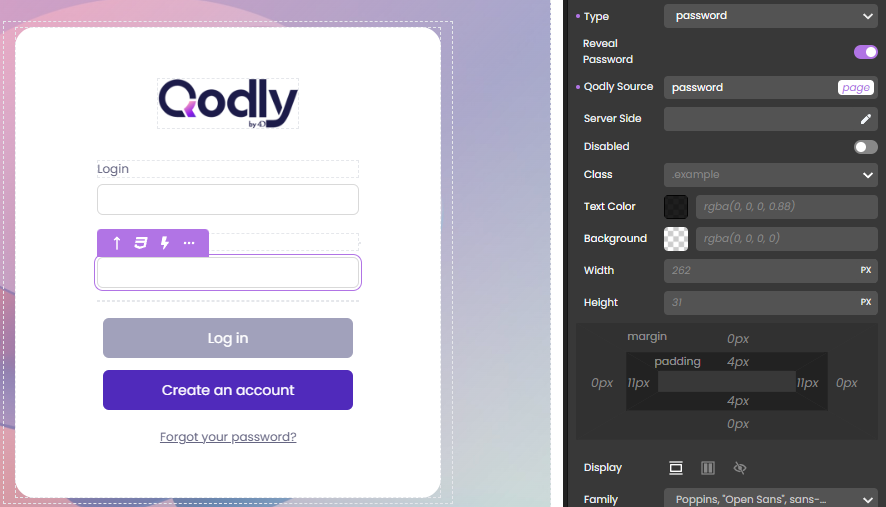
Now open your login page in Qodly Studio and, in the This page Qodly Sources area:
- Create a Qodly source of type string called "login".
- Create a Qodly source of type string called "password".

Adjust the login form to remove unnecessary components, and bind "login" and "password" text inputs to their corresponding Qodly source:
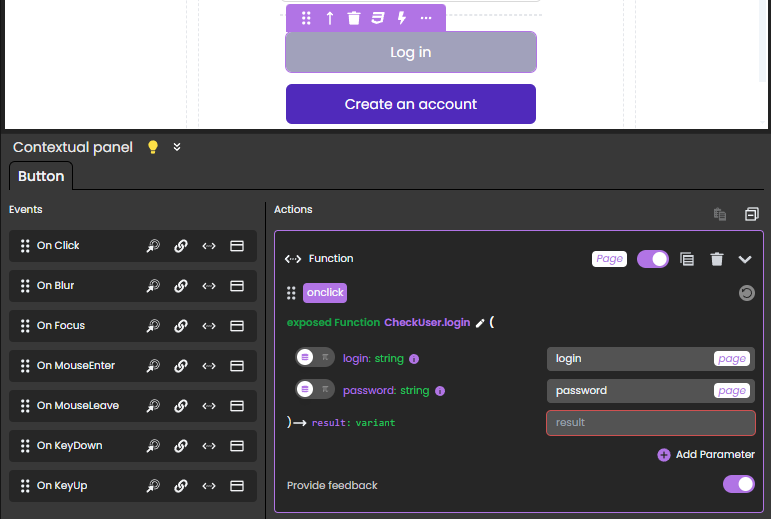
Now select the Log in button and add a Function call to the onClick event. Select the login function to map the function event, enter parameter names (which are the Qodly sources we just created). Do not forget to enable the Provide feedback setting. Doing so, messages generated by the login() function (by using the throw() and webForm.setMessage() commands) will be displayed to the user. Click Save all.
Now let's test this. Use your public URL, enter a random login and password and click Log in:
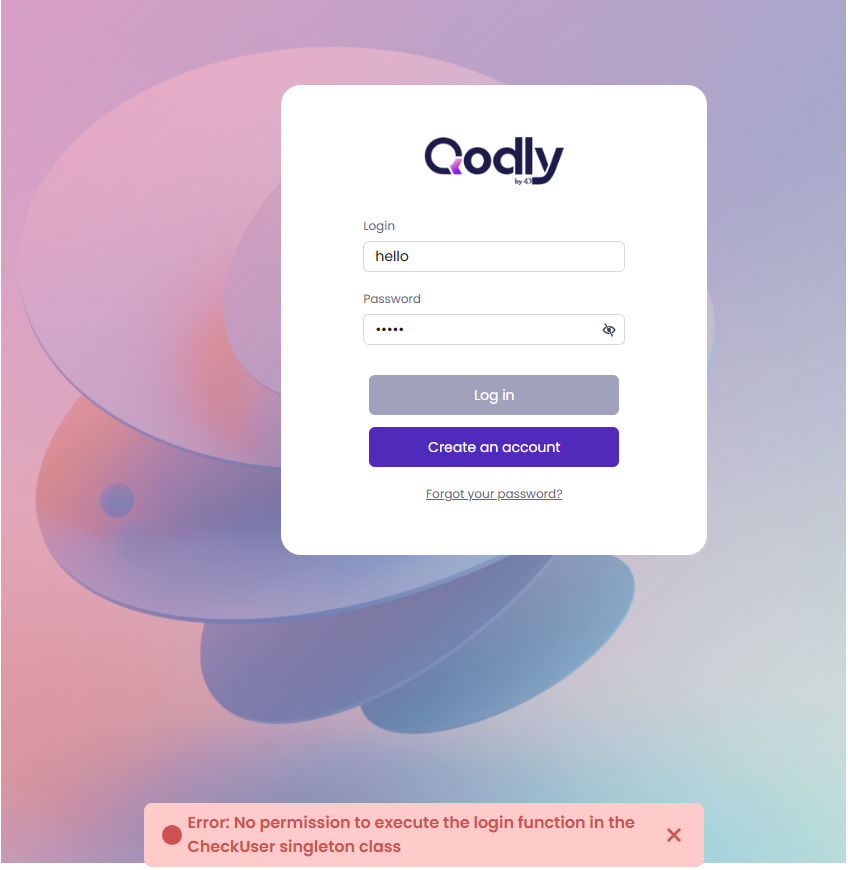
You get a permission error. Of course! Remember, your datastore is protected not only for data access but also for function execution.
Adjust permissions
When a guest user displays the Login page, in fact they cannot access anything: items, users, but also all functions are prohibited.
How to solve this issue? It is quite simple. First of all, we will grant access to the CheckUser.login() function for guest users.

But this is not enough. Guests are able to execute the login() function, but they still cannot access users data. If you execute the function now, you will get errors due to your datastore protection when trying to check the credentials. One solution would be to grant access to the user dataclass for guests, but we do not want that - we do not want guests to be able to retrieve all our users' data.
What we want is to temporarily provide access to the users' data, just for the login() function to execute and check user's credential. This is possible by using promotion.
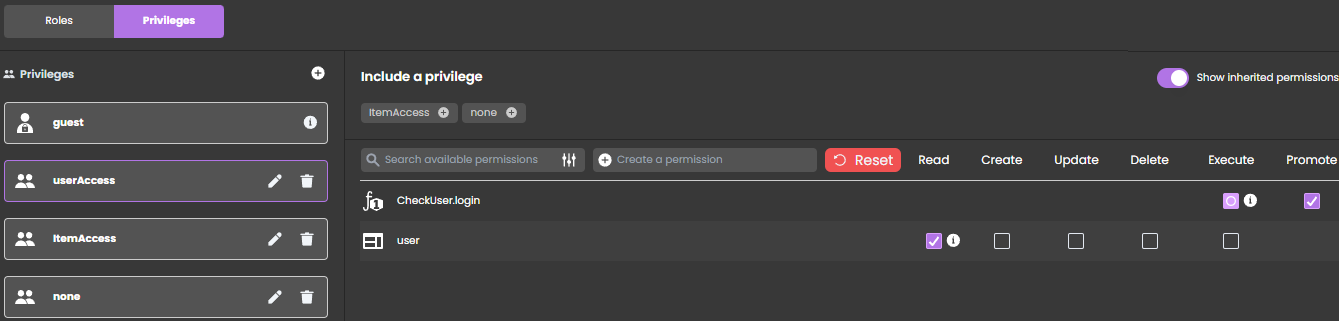
Create a "userAccess" privilege, and grant it permission to read the user dataclass. At the same time, promote the CheckUser.login() function permission (automtically inherited from "guest" privilege) so that it can use this "userAccess" privilege. In the end you get this:
By doing so, everytime the CheckUser.login() function will be executed, it will have the "userAccess" privilege, which itself has access granted to user data. And your data remains safe because any REST request to your user dataclass won't return anything.
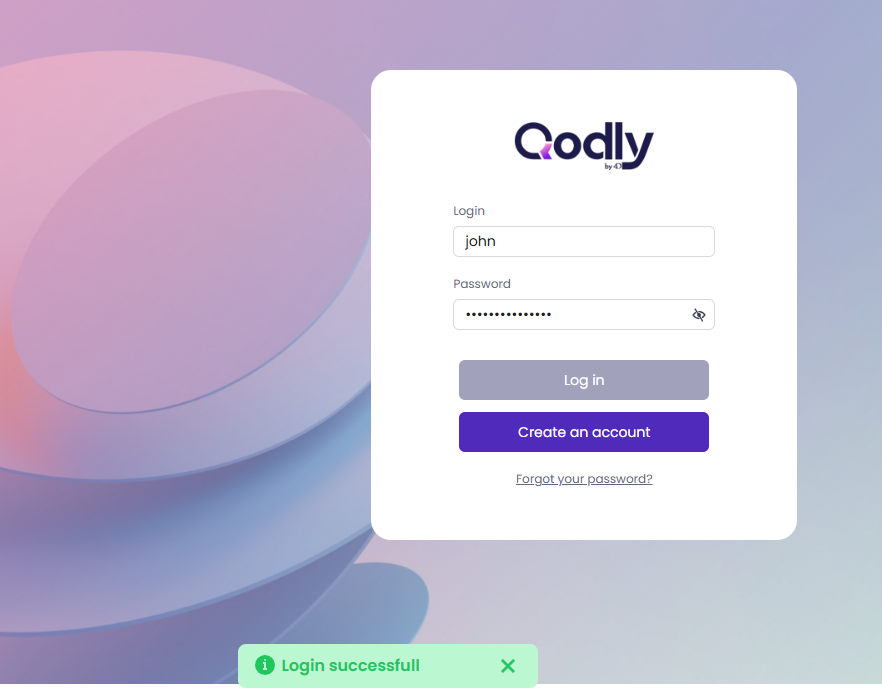
Now if you try to login with wrong credentials, you get the expected error:

And if you try correct credentials, you're successfully logged in!
If you forgot what correct credentials are, read the Prepare data method code.
The final step is still missing: the user should be brought to the welcome page in case of successful login.
Navigation after login
After successful authentication, a user should navigate to the welcome page.
To do this, on the login page, setup a Navigation action on the Log in button click. Select the welcome page as a Target, and ensure it opens in the Current Tab.

- If the
login()function runs without error, the navigation action will be triggered. - If the
login()function throws an error, the navigation action will NOT be triggered.
Final testing
-
Clear your browser's cache.
-
Open your public URL.
-
Try some wrong credentials: you receive an error and your stay on the login page. If you try to open directly the welcome page, no data is displayed.
-
Now try with valid credentials, you reach the welcome page and items are displayed!