Data Explorer
Overview
The Data Explorer provides a comprehensive web interface for viewing, querying, and editing data within your project's datastore. This tool allows you to browse all entities, search, sort, and filter attribute values, facilitating the identification and resolution of issues during the development process. Additionally, it offers control over and editing capabilities for your data.
Requirements
Supported Browsers
The Data Explorer supports the following web browsers:
Chrome
Safari
Edge
Firefox
Resolution
Minimum: 1280x720
Recommended: 1920x1080
Opening the Data Explorer
To open the Data Explorer web page for a Qodly application:
- Open your application in Qodly Studio.
- Click on the
Databutton on the Studio home page:
Or, click on the
Data button in the header bar: 

The Data Explorer window will open in a new tab, displaying the available data in your application.
Data Explorer Interface
The Data Explorer interface consists of several key areas:
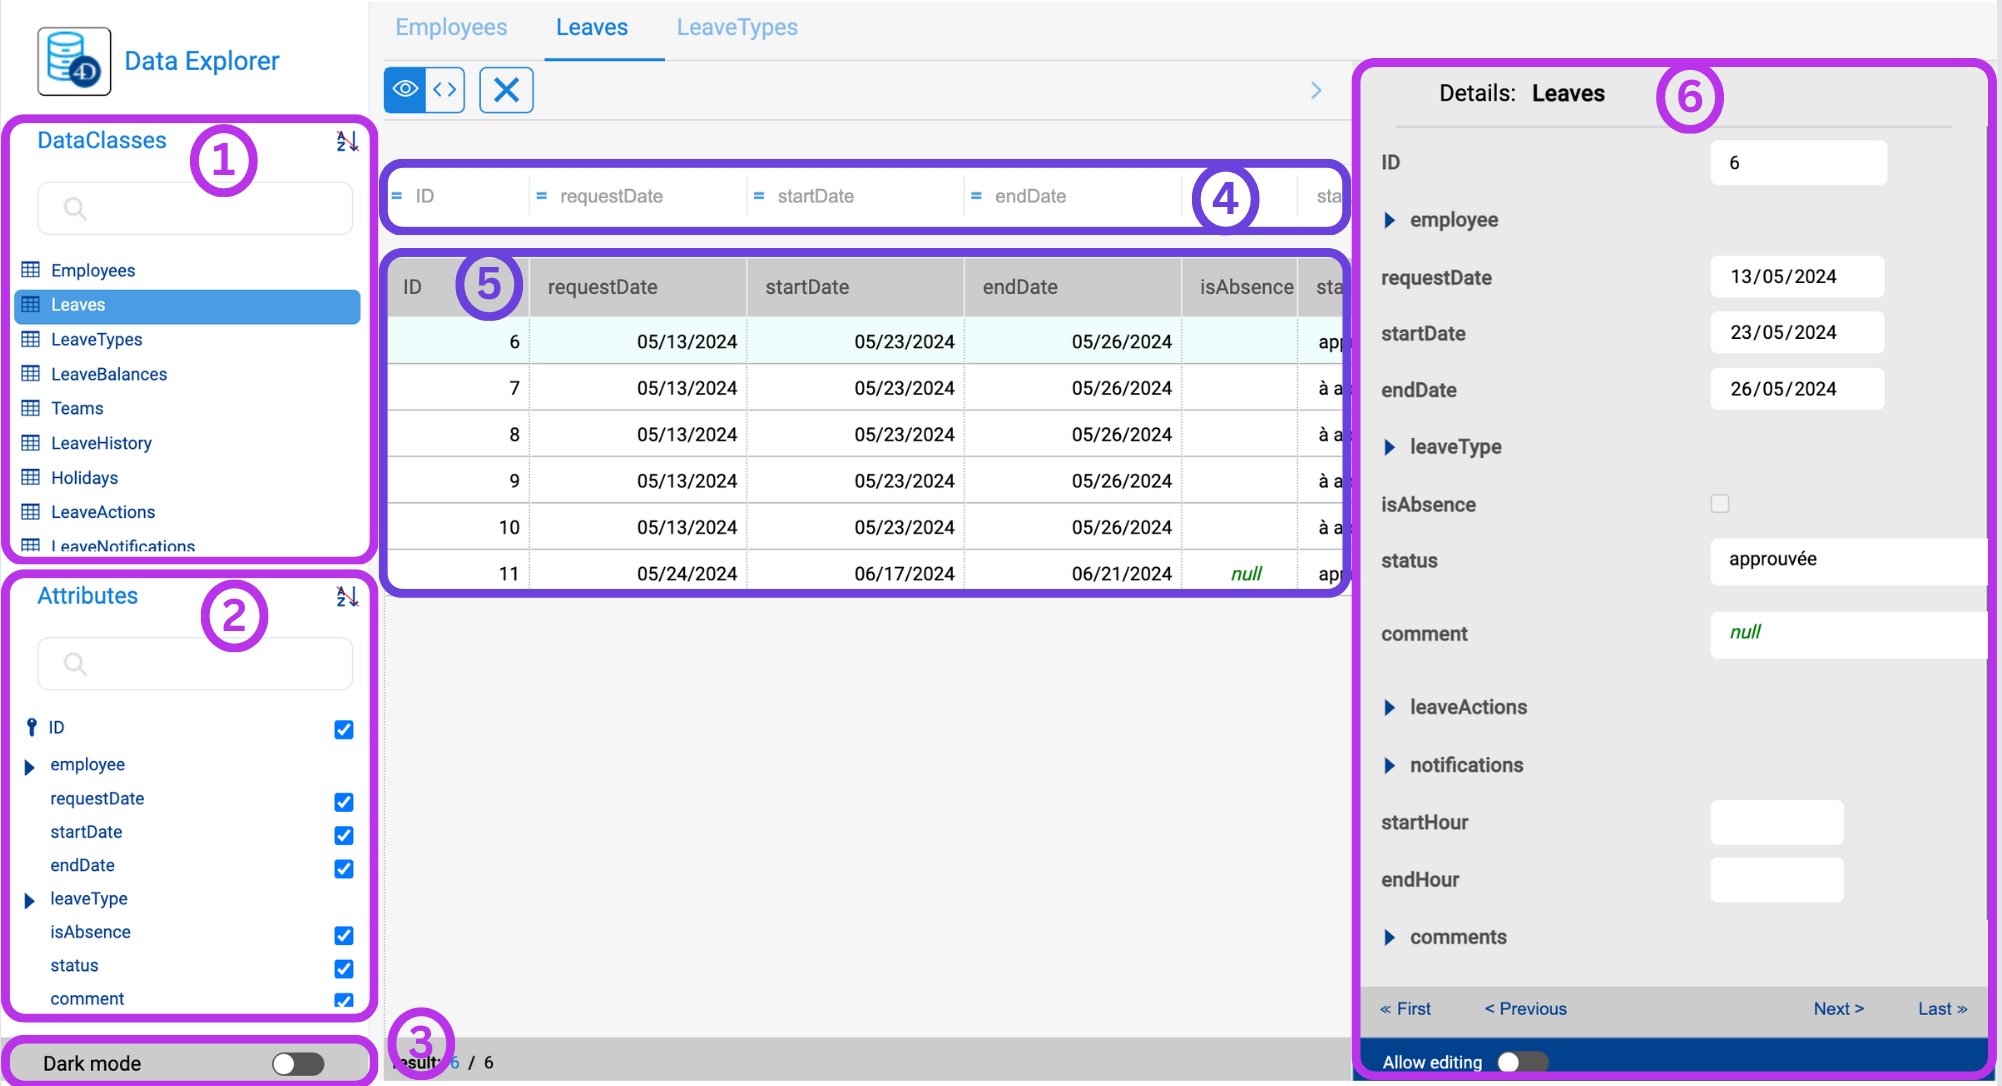
DataClasses Area : Located on the left side, this area allows selection and display of dataclasses. You can select which dataclasses to display and Use the search areas to filter dataclass names.
Attributes Area : Located on the left side, this area allows selection and display of the attributes of the selected dataclass. Attributes are ordered by creation, with specific icons for primary key and indexed attributes. Use the search areas to filter attribute names and you can reduce the number of columns in the data grid by unchecking attributes.
Dark Mode : Switch to dark mode using the selector at the bottom of the page.
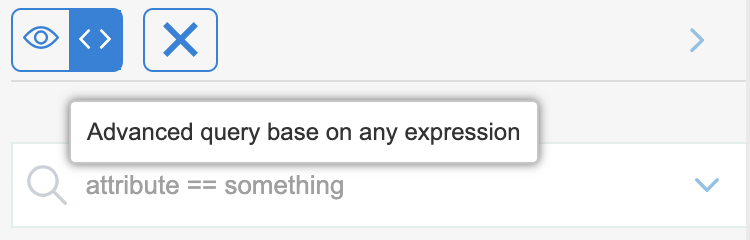
Search Area : Two query modes are available:
Query on attributes: The default mode
Advanced query with expression: Selected using the corresponding button
 (the X button allows you to reset the query area and thus stop filtering).
Data Grid : The central part displays the data grid with entities of the selected dataclass, with each column representing an attribute. The default view shows all entities, which can be filtered using the search area.
Details Area : On the right side, displaying attribute values of the selected entity and related data. Navigation between entities is facilitated by First / Previous / Next / Last links.
All attribute types, including pictures, JSON objects, calculated, and alias attributes are displayed. Related data can be viewed in expandable/collapsible areas.
Ctrl+Click (Windows) or Command+Click (macOS) on related attribute names opens their values in a floating area.
The name of the selected dataclass is added as a tab above the data grid. Using these tabs, you can switch between dataclasses that have been already selected. You can remove a referenced dataclass by clicking the "remove" icon (X) after the dataclass name.
Browsing Data
The Data Explorer provides a detailed and customizable view of your data, allowing you to query and sort it effectively.
Ordering entities
Entities can be reordered based on attribute values (excluding picture and object attributes):
- Click on a column header to sort entities. By default, the sort is ascending. Clicking twice reverses the sort order (descending). Sorted columns are marked with an icon
 and italicized names italics.
Multi-level sorting is available by holding the Shift key and clicking sequentially on column headers.
Query on attributes
Filter entities by entering values to find (or to exclude) in the areas above the attribute list. Filters are applied across multiple attributes with an implicit AND operation. The entity list is automatically updated when you type in.
Different operators are available based on the data type:
- Text: Text filters are case-insensitive and of the "starts with" type. Wildcard character (@) can be used for more specific queries:
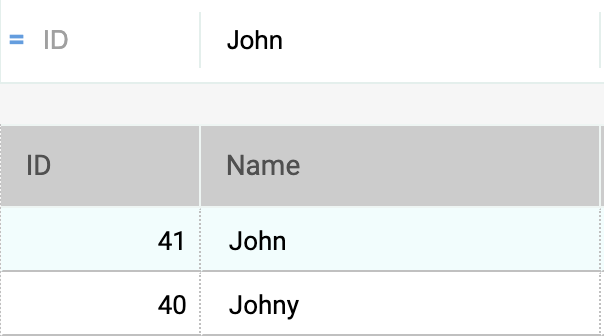
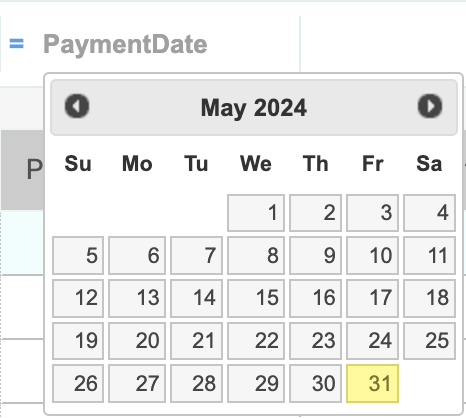
A filter with Finds Bel All values beginning with “Bel” @do All values containing “do” Bel@do All values starting with “Bel” and containing “do” - Dates: Use the datepicker widget for date attributes (Click on the date area to display the widget).
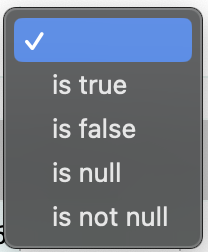
- Booleans: Boolean attributes can be filtered on true, false, null, or not null.
- null: Attribute value not defined.
- not null: Attribute value defined (true or false).
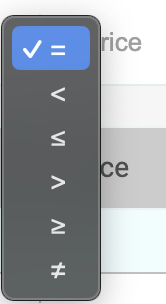
- Numeric operators: Select operators (default is "=") for numeric, date, and time attributes. You can select another operator from the operator list.
AND is automatically applied. For example, the following filter displays entities with firstname attribute starting with "flo" AND salary attribute value > 50000.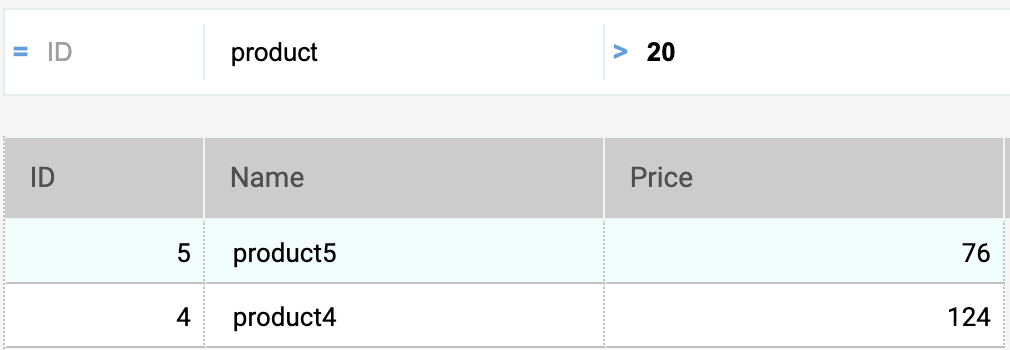
You cannot filter on picture or object attributes.
Advanced Queries With Expression
Use documented query expressions, with limitations:
No
eval()formulas for security.No placeholders, use
queryStringwith values.String values with spaces must be in double quotes ("").
Example
For example:
Quantity > 4 AND Purchaser.Name= "Harry"
Display both queryPlan and queryPath details by clicking the expand  button:
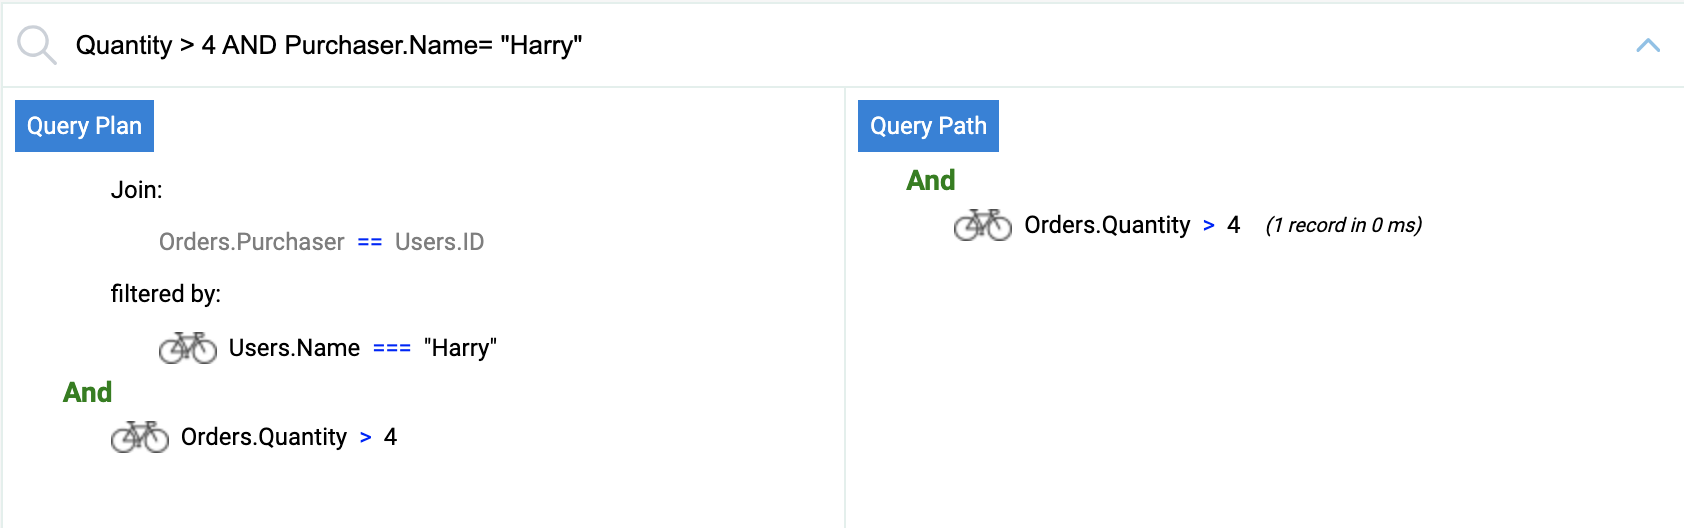
Hover over subquery blocks for details.
Right-click in the query area to display previous valid queries:

Editing Data
Modify attribute values, and add or delete entities through the Data Explorer. These features are intended for administrators to test implementations or fix invalid data.
Allow Editing
Enable editing mode using the Allow editing selector to display edit action buttons: 
The selector is enabled per dataclass and per browser session to prevent accidental modifications, as no confirmation dialogs are displayed.
Entering Values
With editing enabled, enter values for new or selected entities through input widgets in the Details area. Editable attributes include:
- text
- boolean
- numeric
- date
- time
- image (upload or drag and drop)
- object (JSON string)
Blob attributes cannot be modified.
New or modified values are stored in the local cache and must be explicitly saved.
Creating Entities
Create a new entity by clicking the creation button  . Enter values for the entity, which is stored in the local cache and must be explicitly saved.
Attribute values that need to be calculated by Qodly (autogenerated IDs, computed attributes) will be returned only after you saved the entity.
Reloading Values
The reload button  updates the entity attribute values from the data file, ensuring the most recent saved values are displayed.
Saving Modifications
Modifications are done locally and need to be saved to be stored in the data file. Click the Save button  to save changes.
Existing entity modifications are automatically saved when selecting another entity of the same dataclass. In case of conflicts, an error message is displayed, and you can reload values to get the new value and apply your modifications.
Deleting Entities
Delete entities by clicking the delete button  .
.
To delete multiple entities, select them using Shift+click (continuous selection) or Ctrl/Command+click (discontinuous selection) and click the delete button.
If entities cannot be deleted due to conflicts (e.g., locked on the server), they are highlighted in the list.
No confirmation dialog is displayed when deleting entities. Selected entities are immediately deleted from the data.